Installation
Guide for
FIGHTForex Currency Strength Meter V2
Updated 2017-07-29
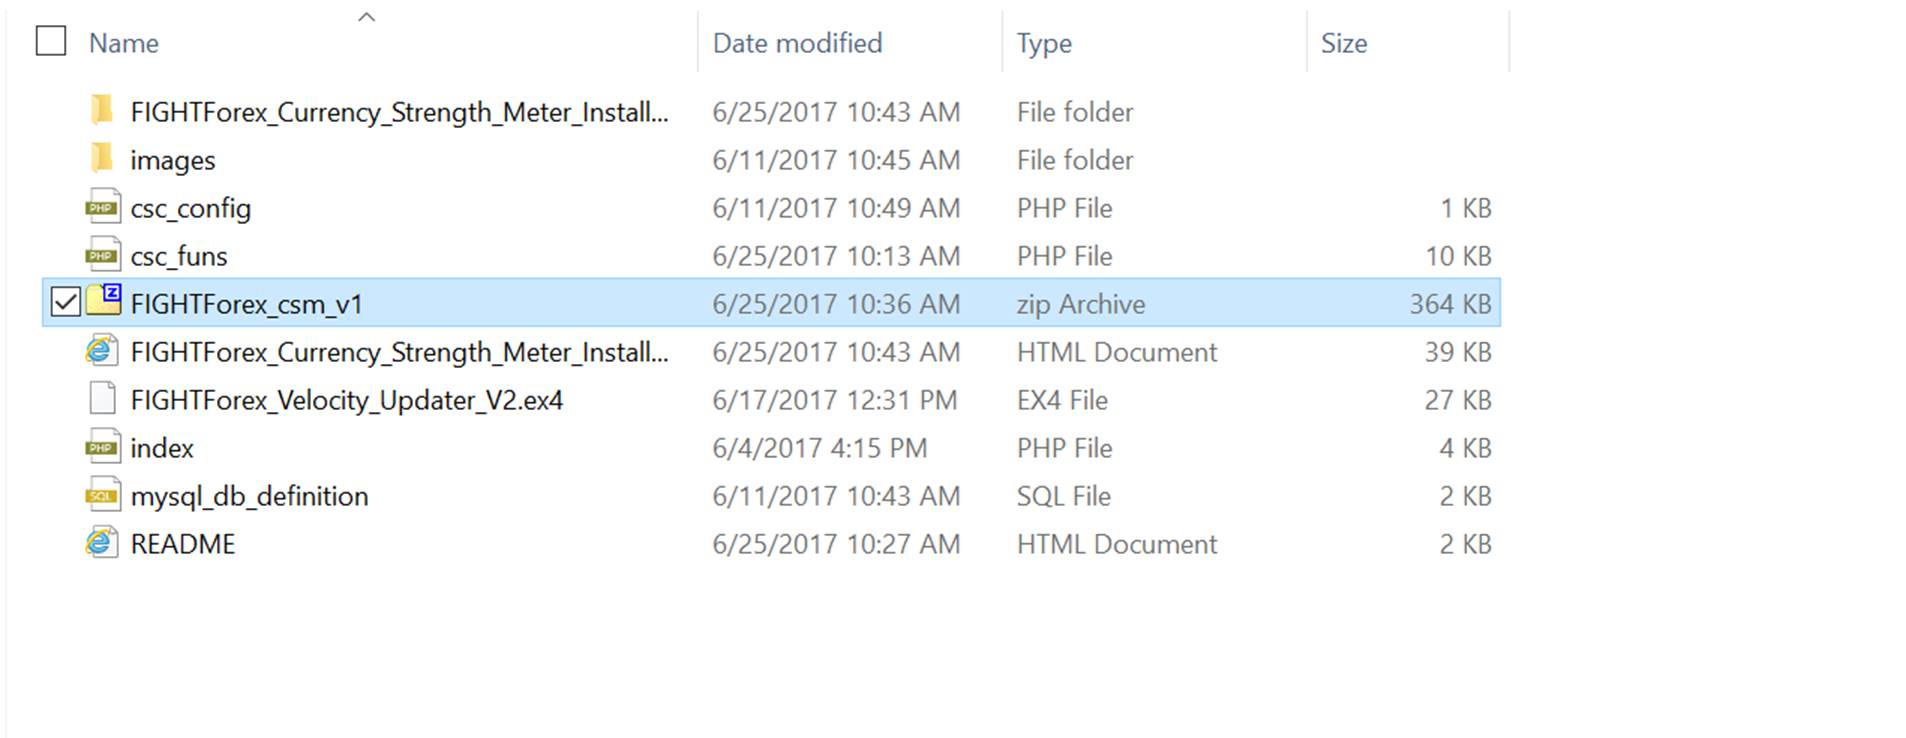
Step 1: Extract files for your .ZIP folder
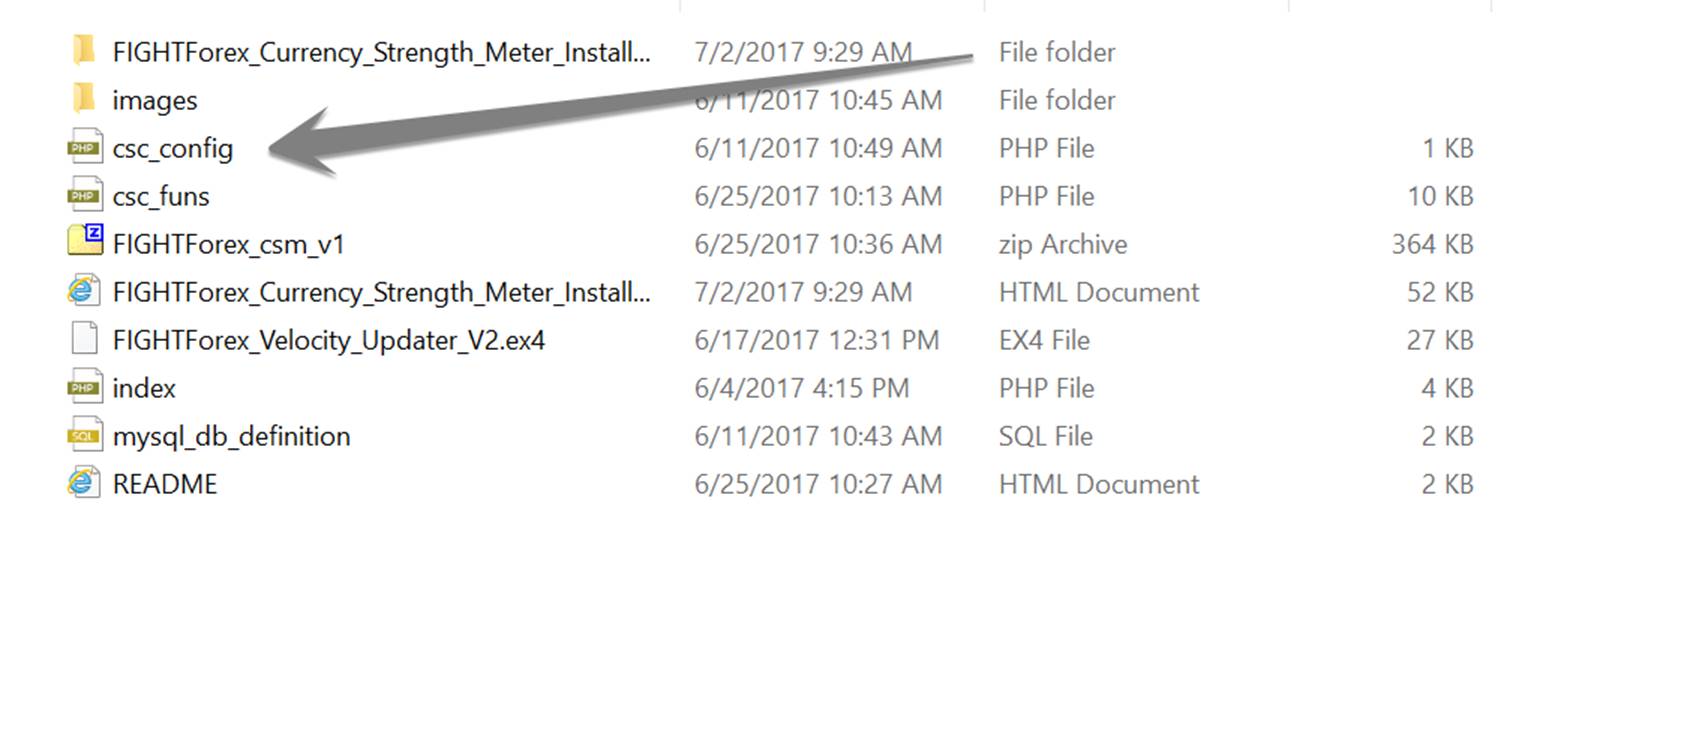
Extract files from the .zip folder you downloaded into a local folder on your computer. Then go to the folder where all files are extracted. It should look something like below.
Step 2: Setup MySQL database on your website
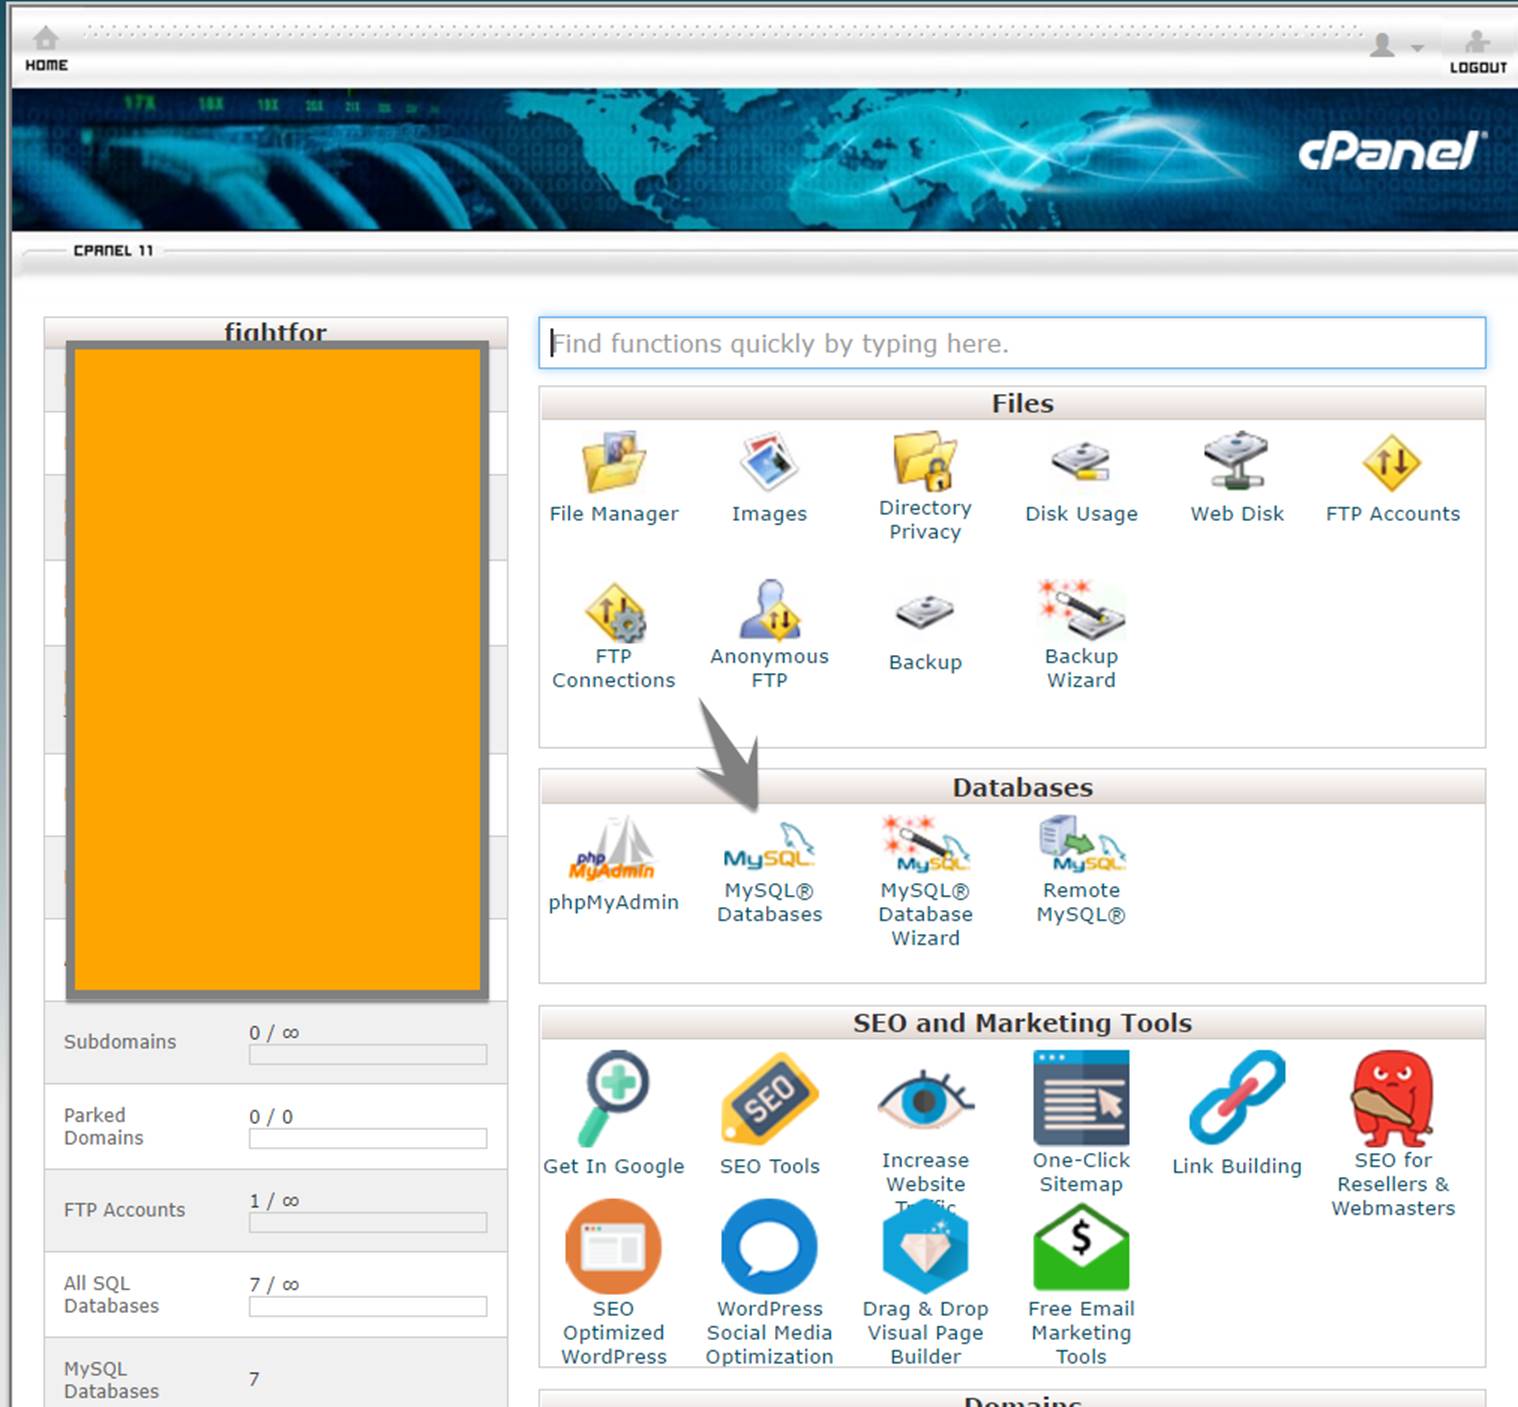
Before you can install the package, you need to create a new database on your site and create the table structure needed. Below set of screenshots show the steps involved in doing this using phpMyAdmin on cPanel. Depending on what web hosting manager software you use, these steps will vary.
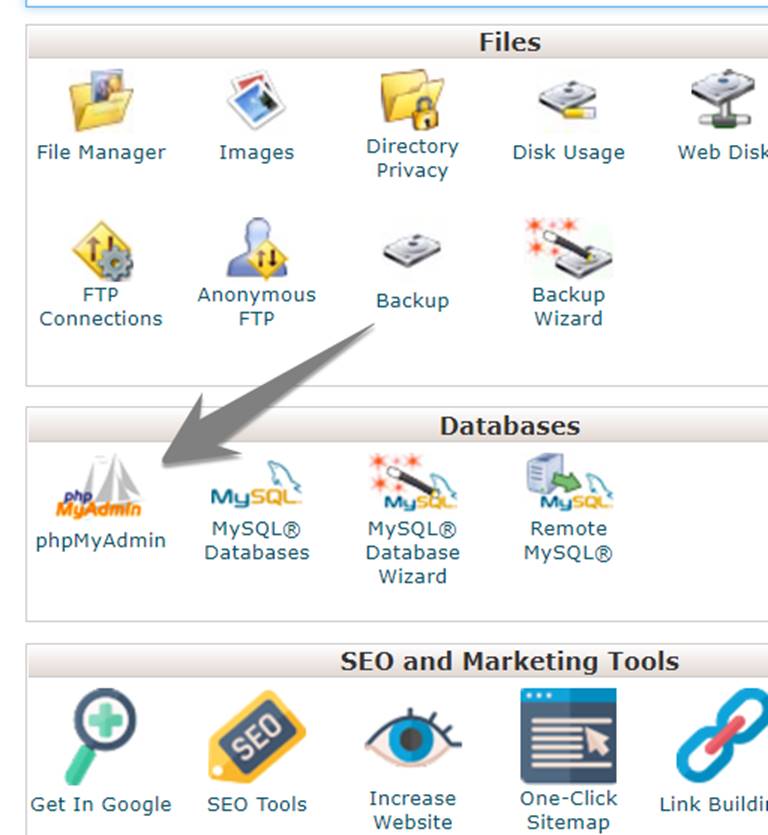
Log in to cPanel and got to MySQL Databases
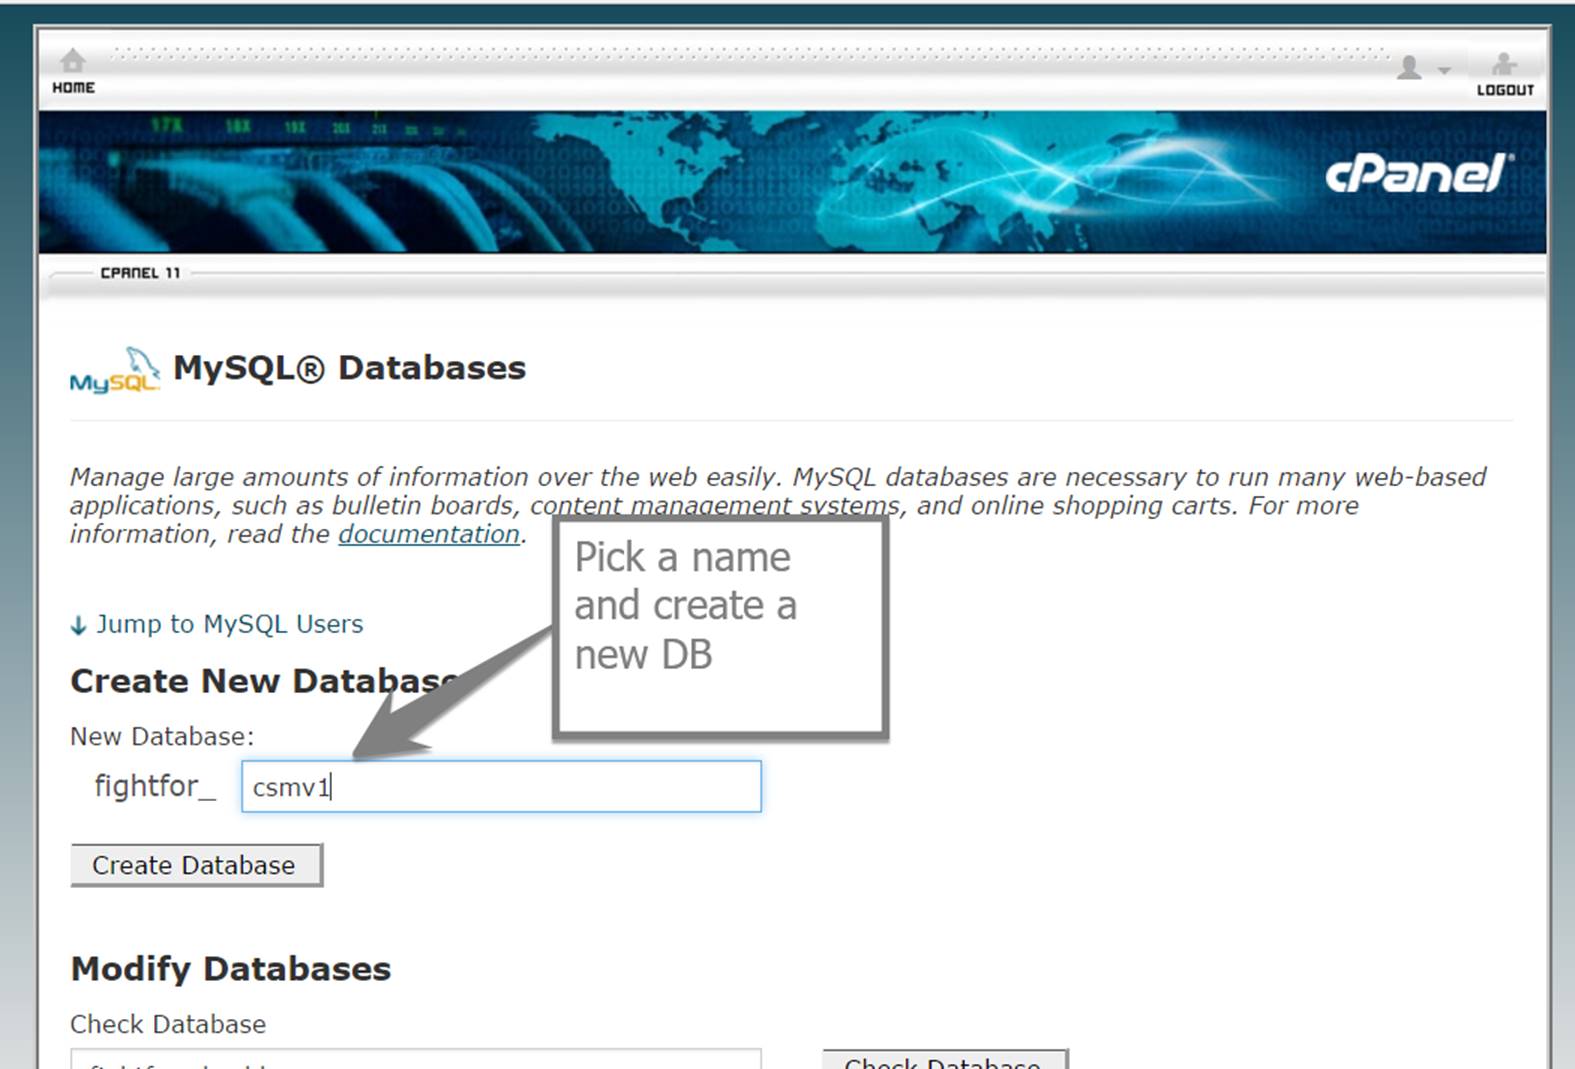
Pick a name for your new DB and create it:
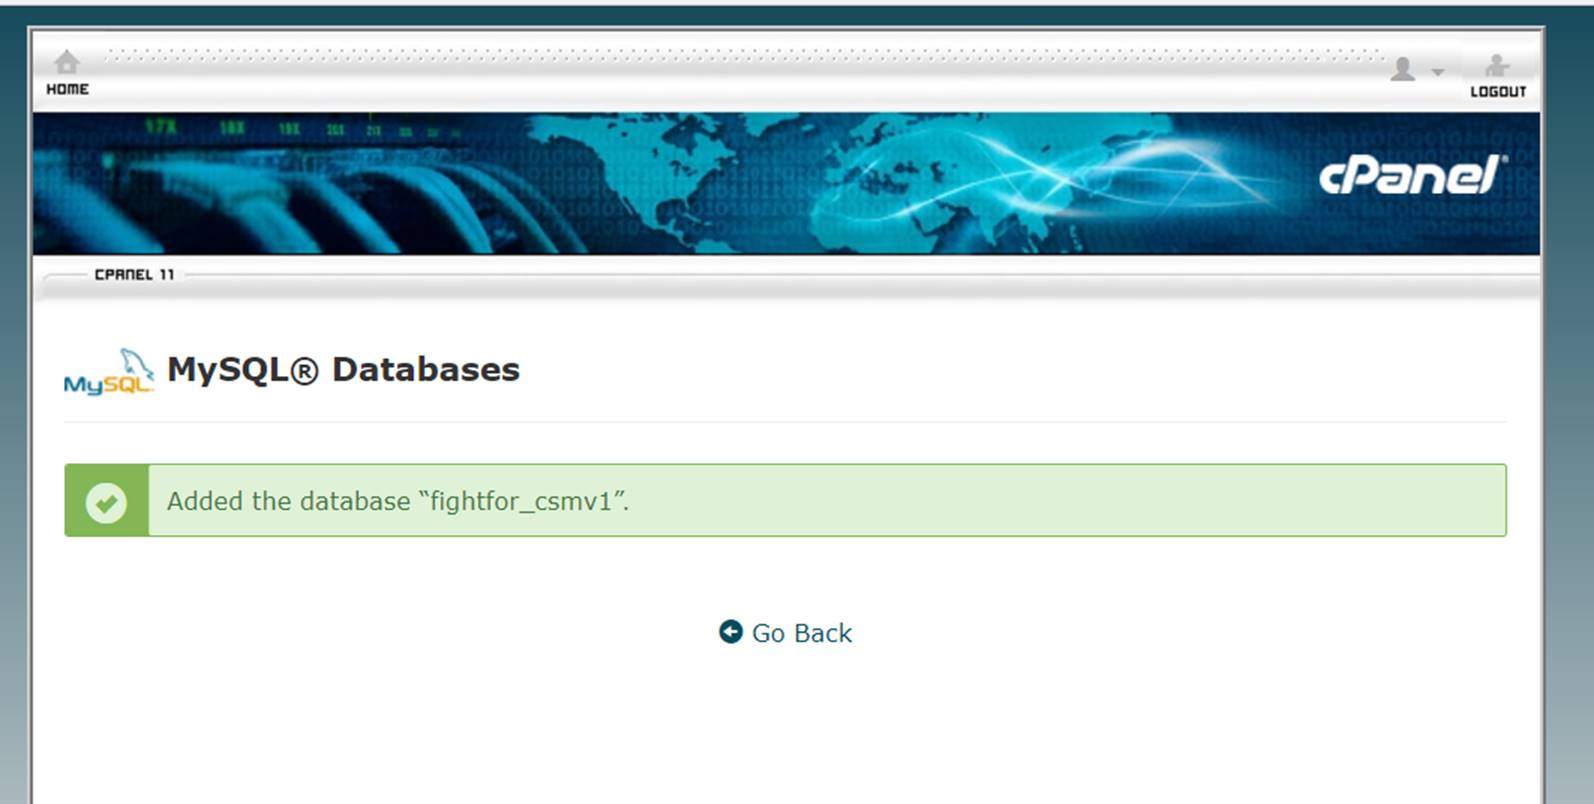
You should see a confirmation message like below.
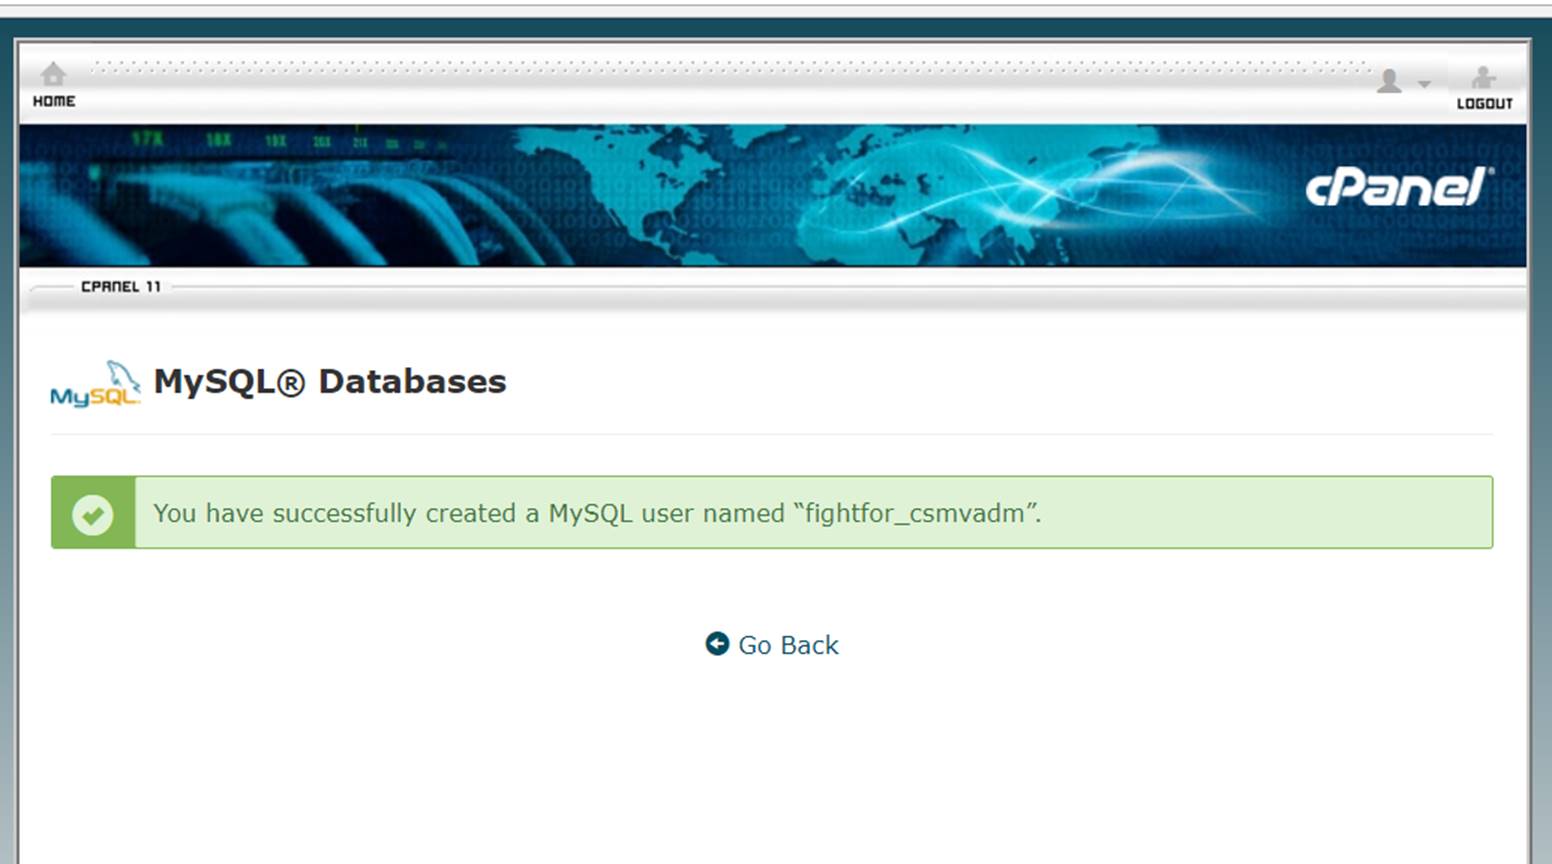
Now create a new database user.

You should get the following success message (don’t forget to note down your username and password).
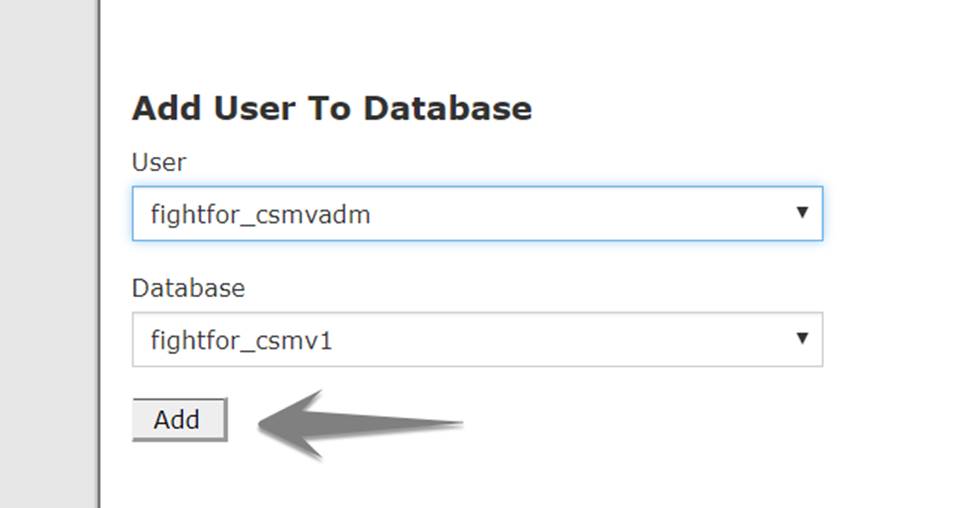
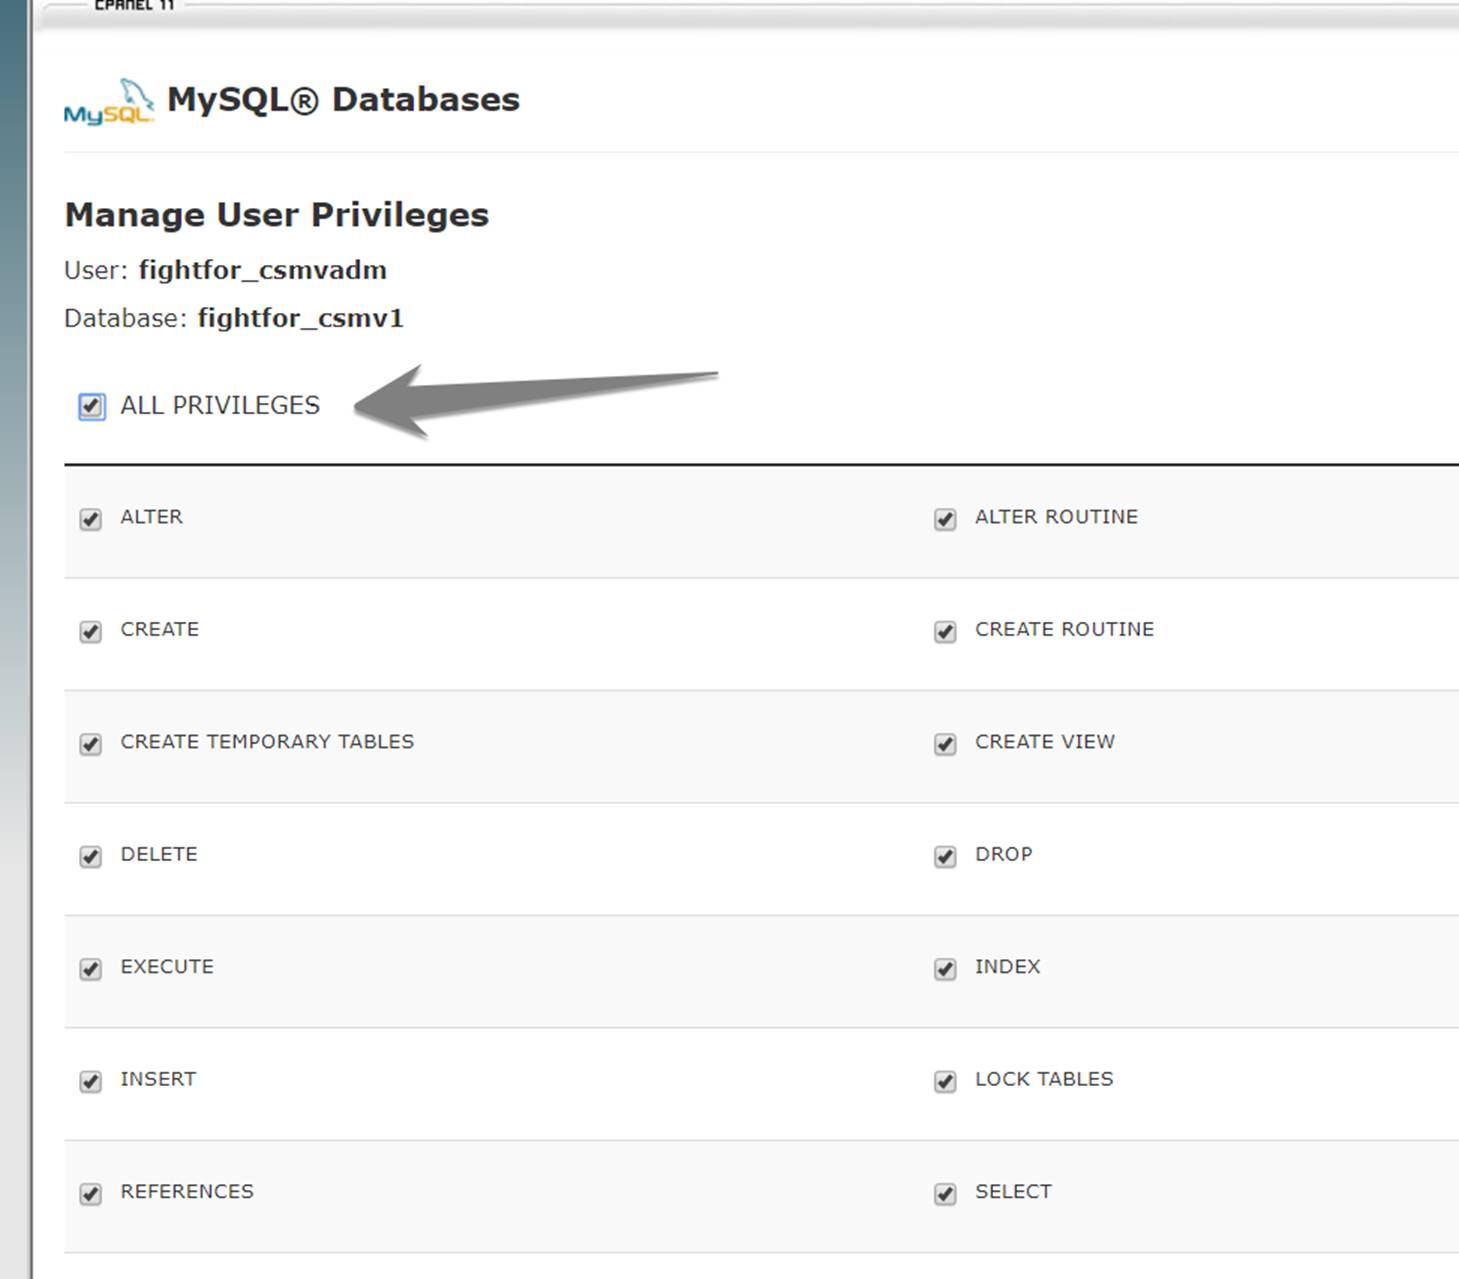
Now add user to the database and provide all the priviliedges.
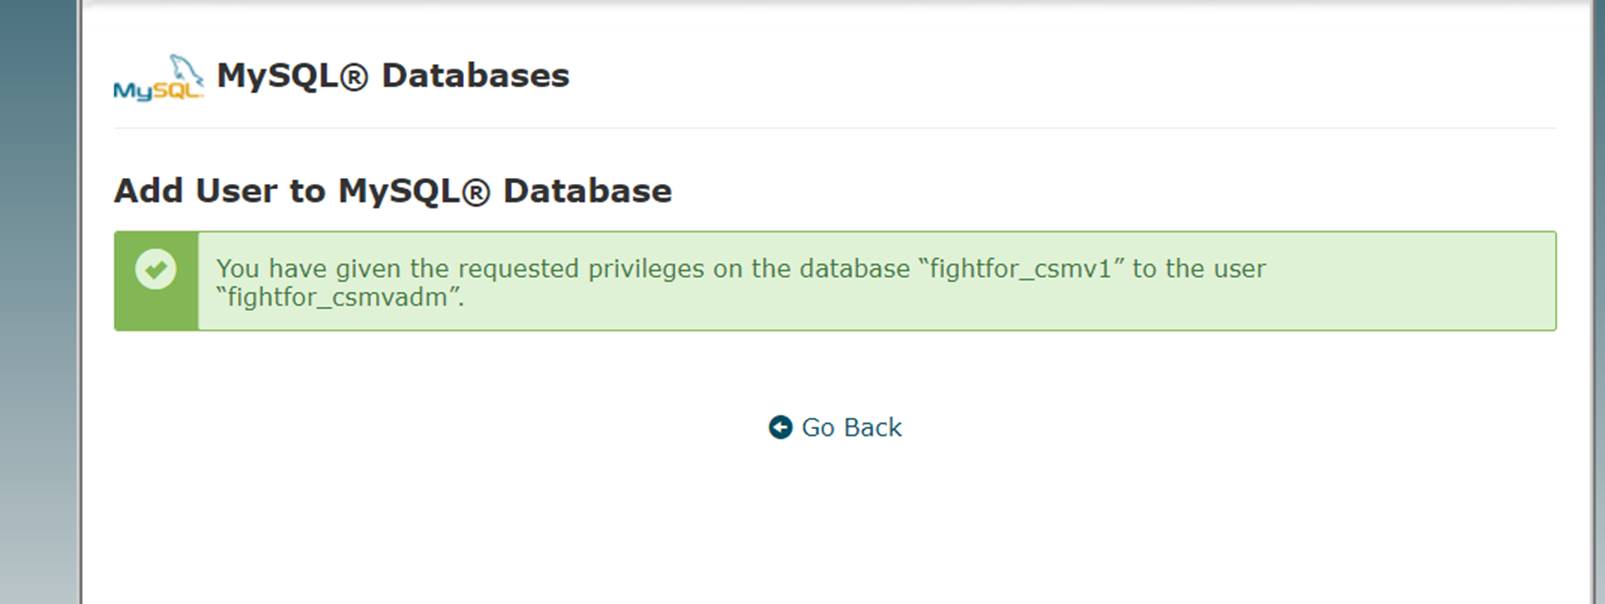
You should see a success message as follows:
Step 3: Create the database tables
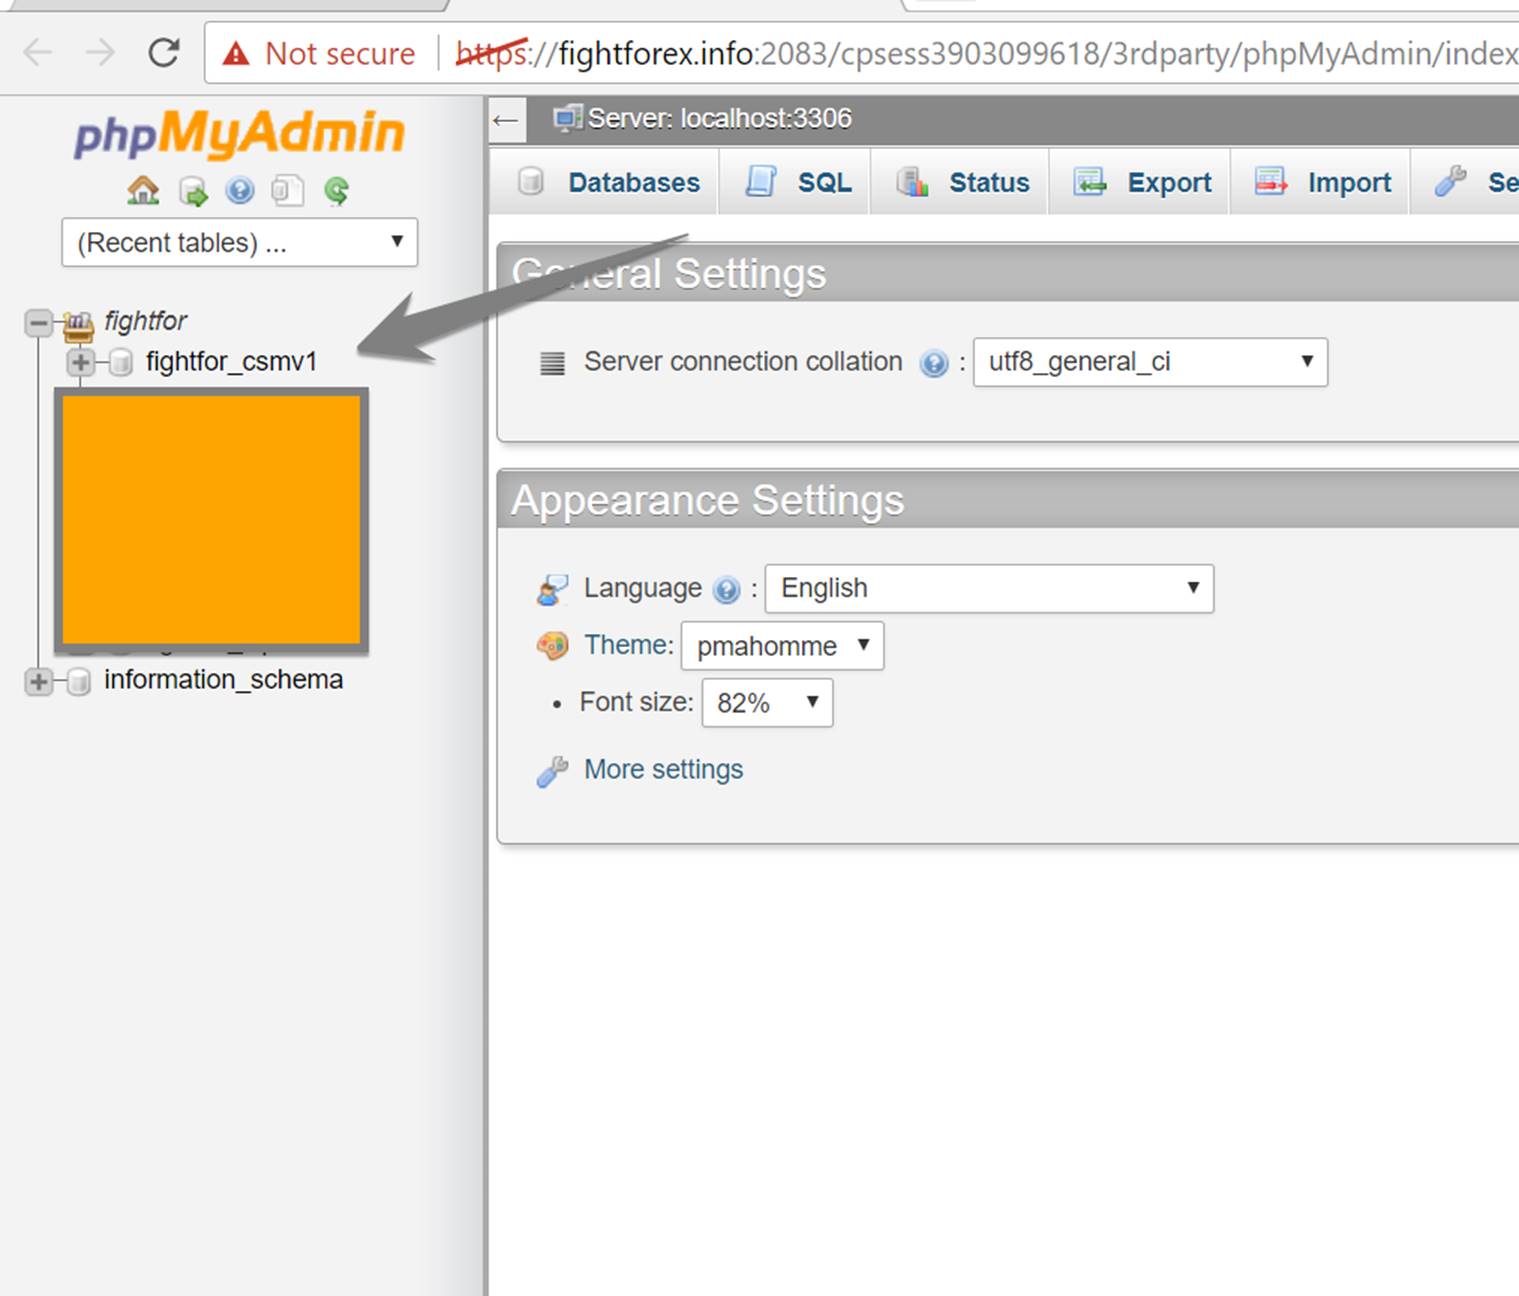
Log into the newly created database using phpMyAdmin
Go to the newly created database.
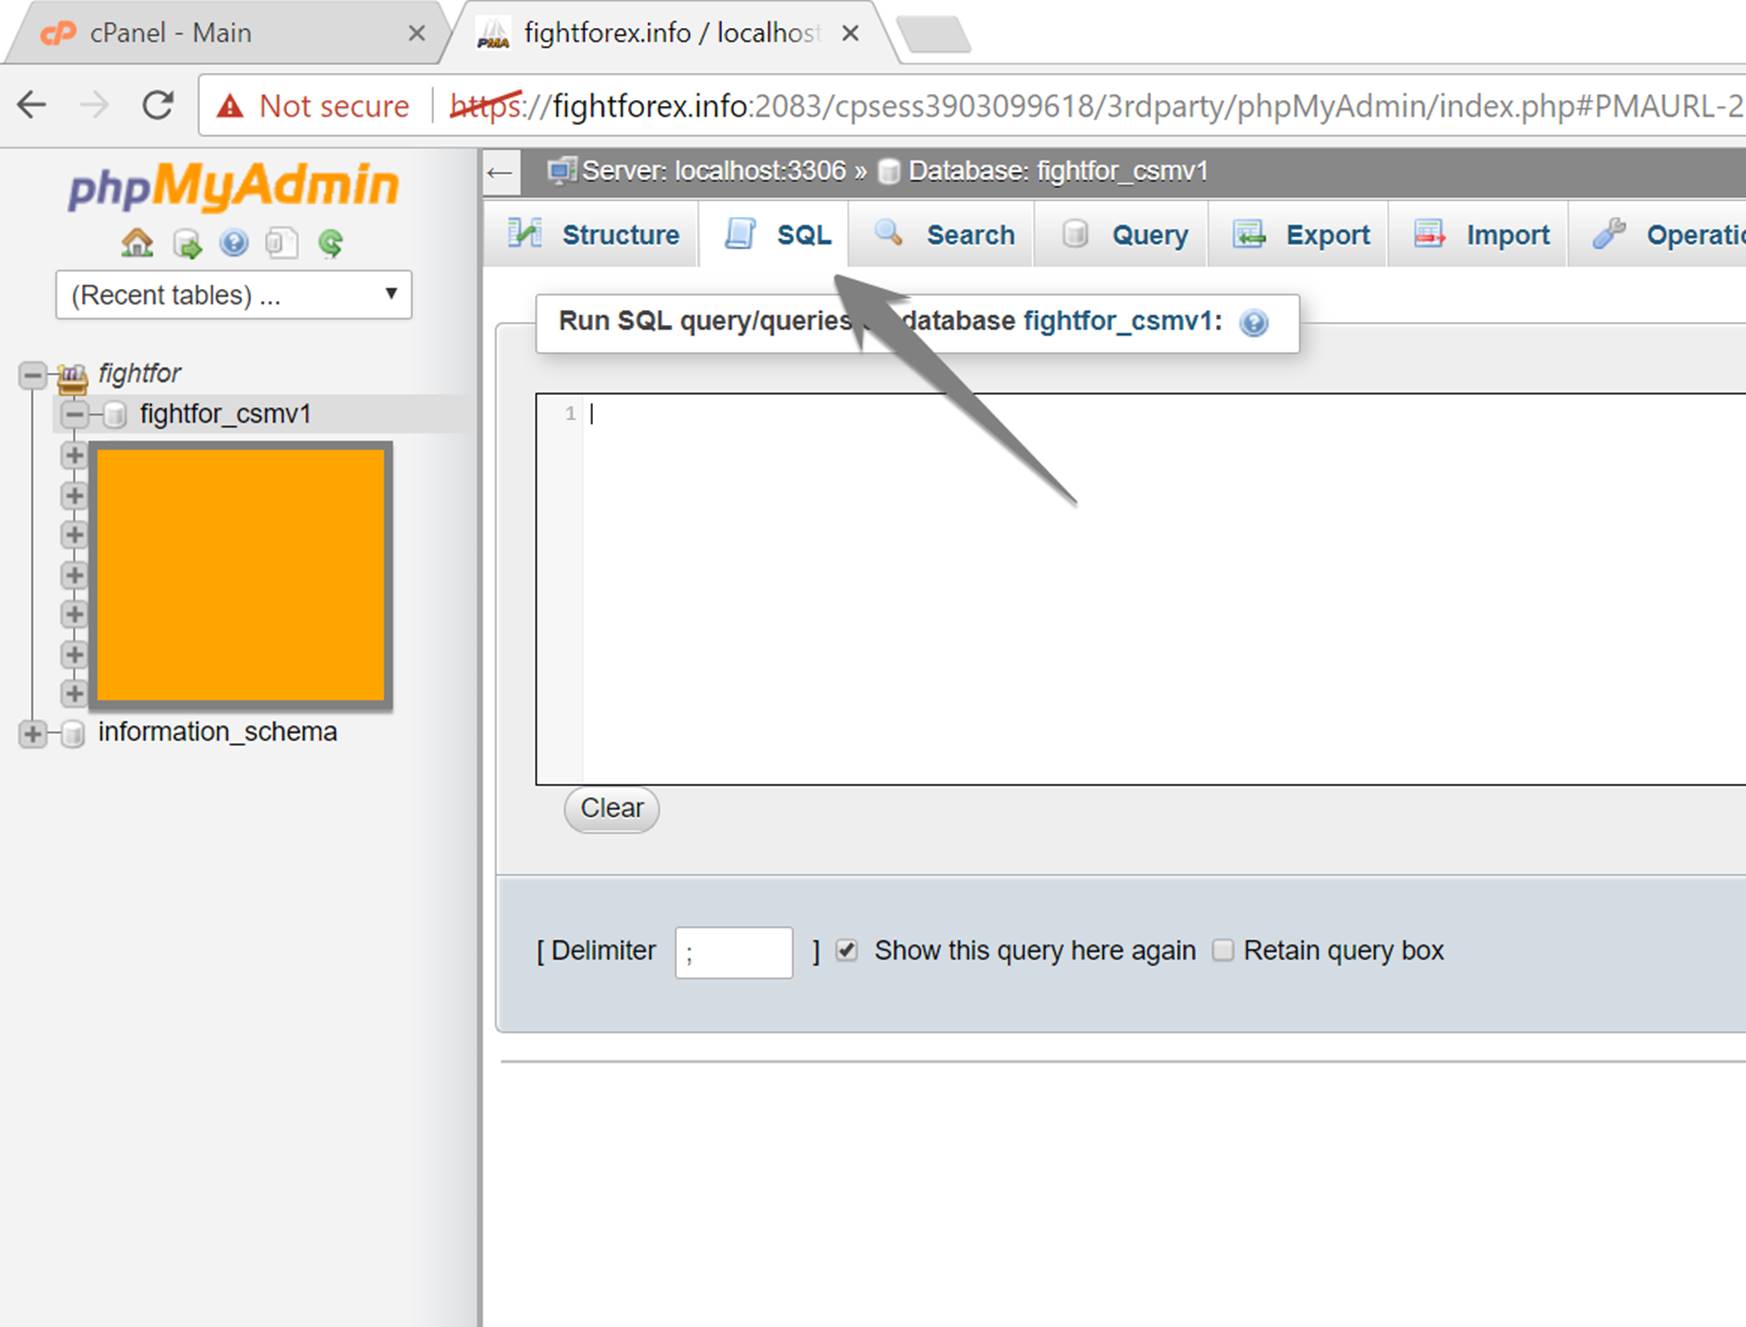
Go to the “SQL” tab within the database view.
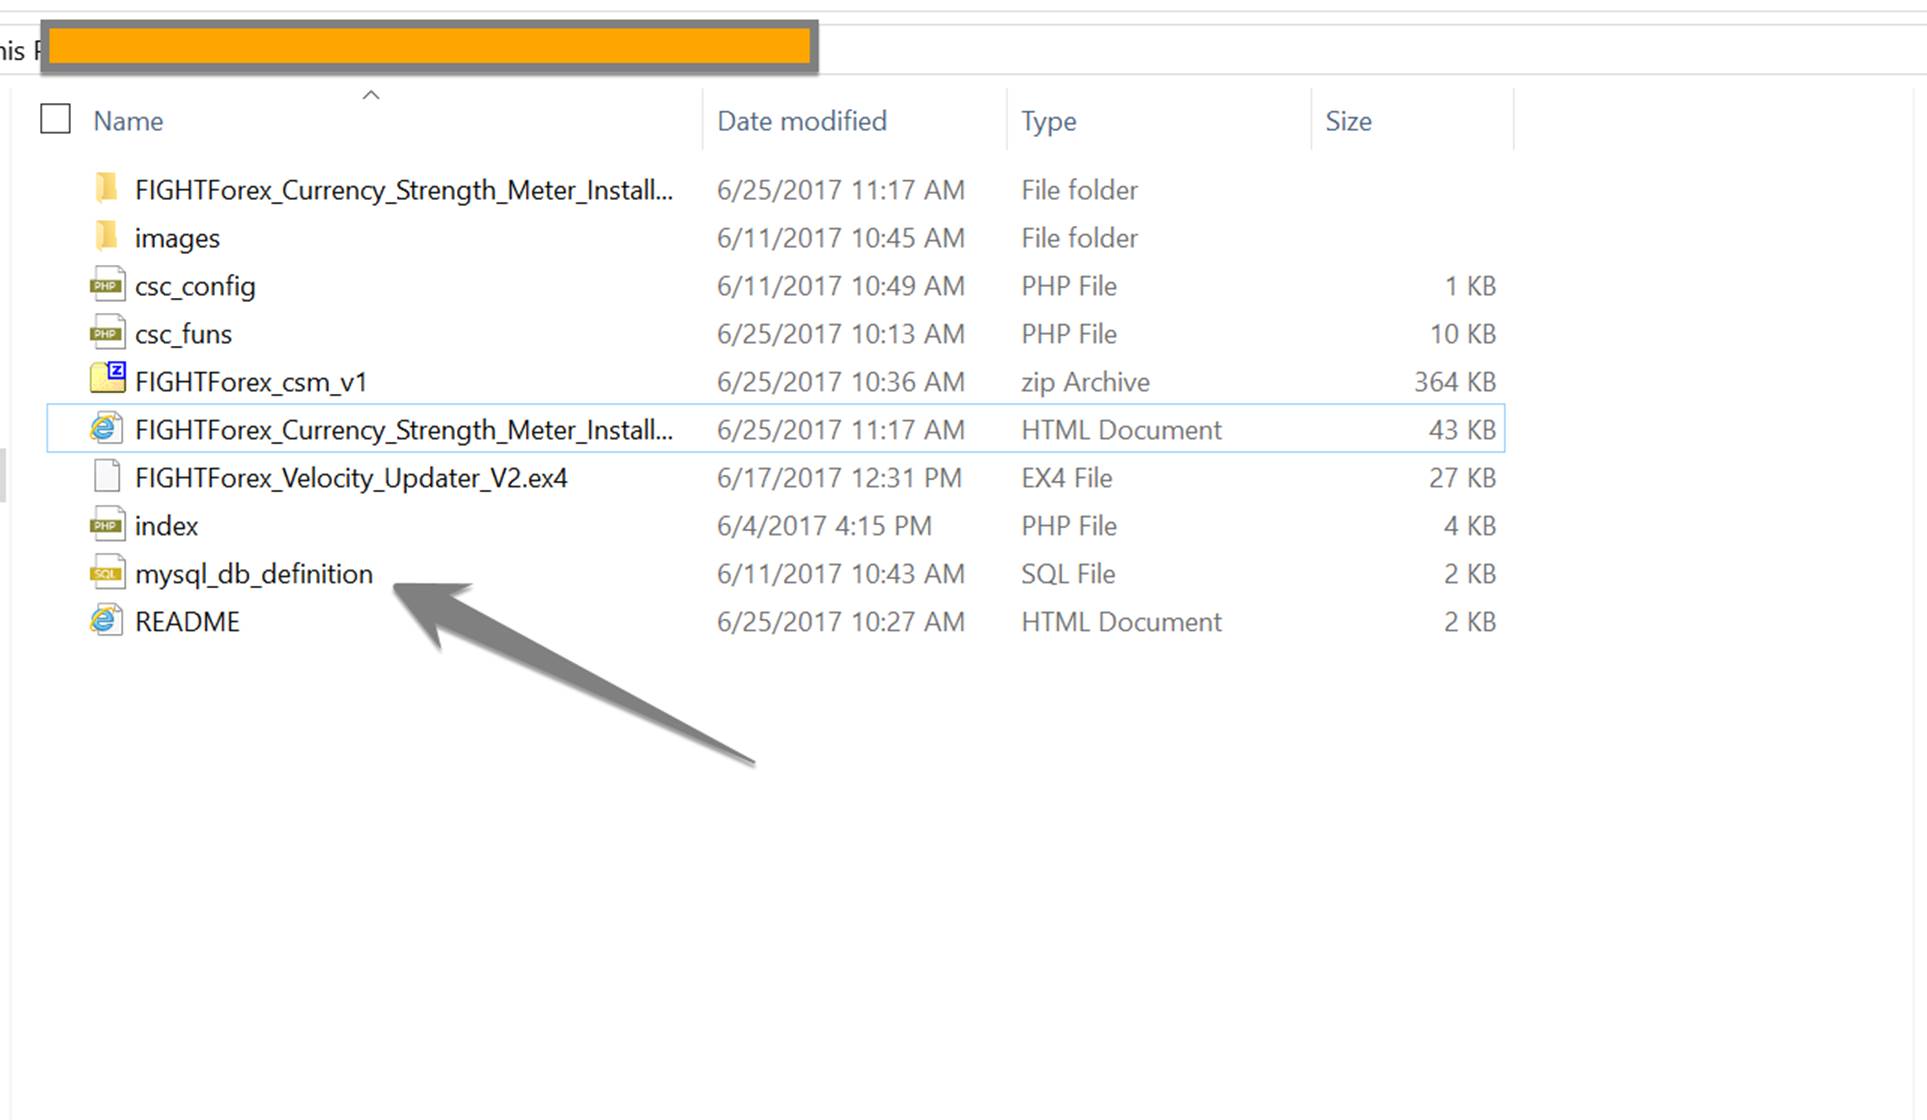
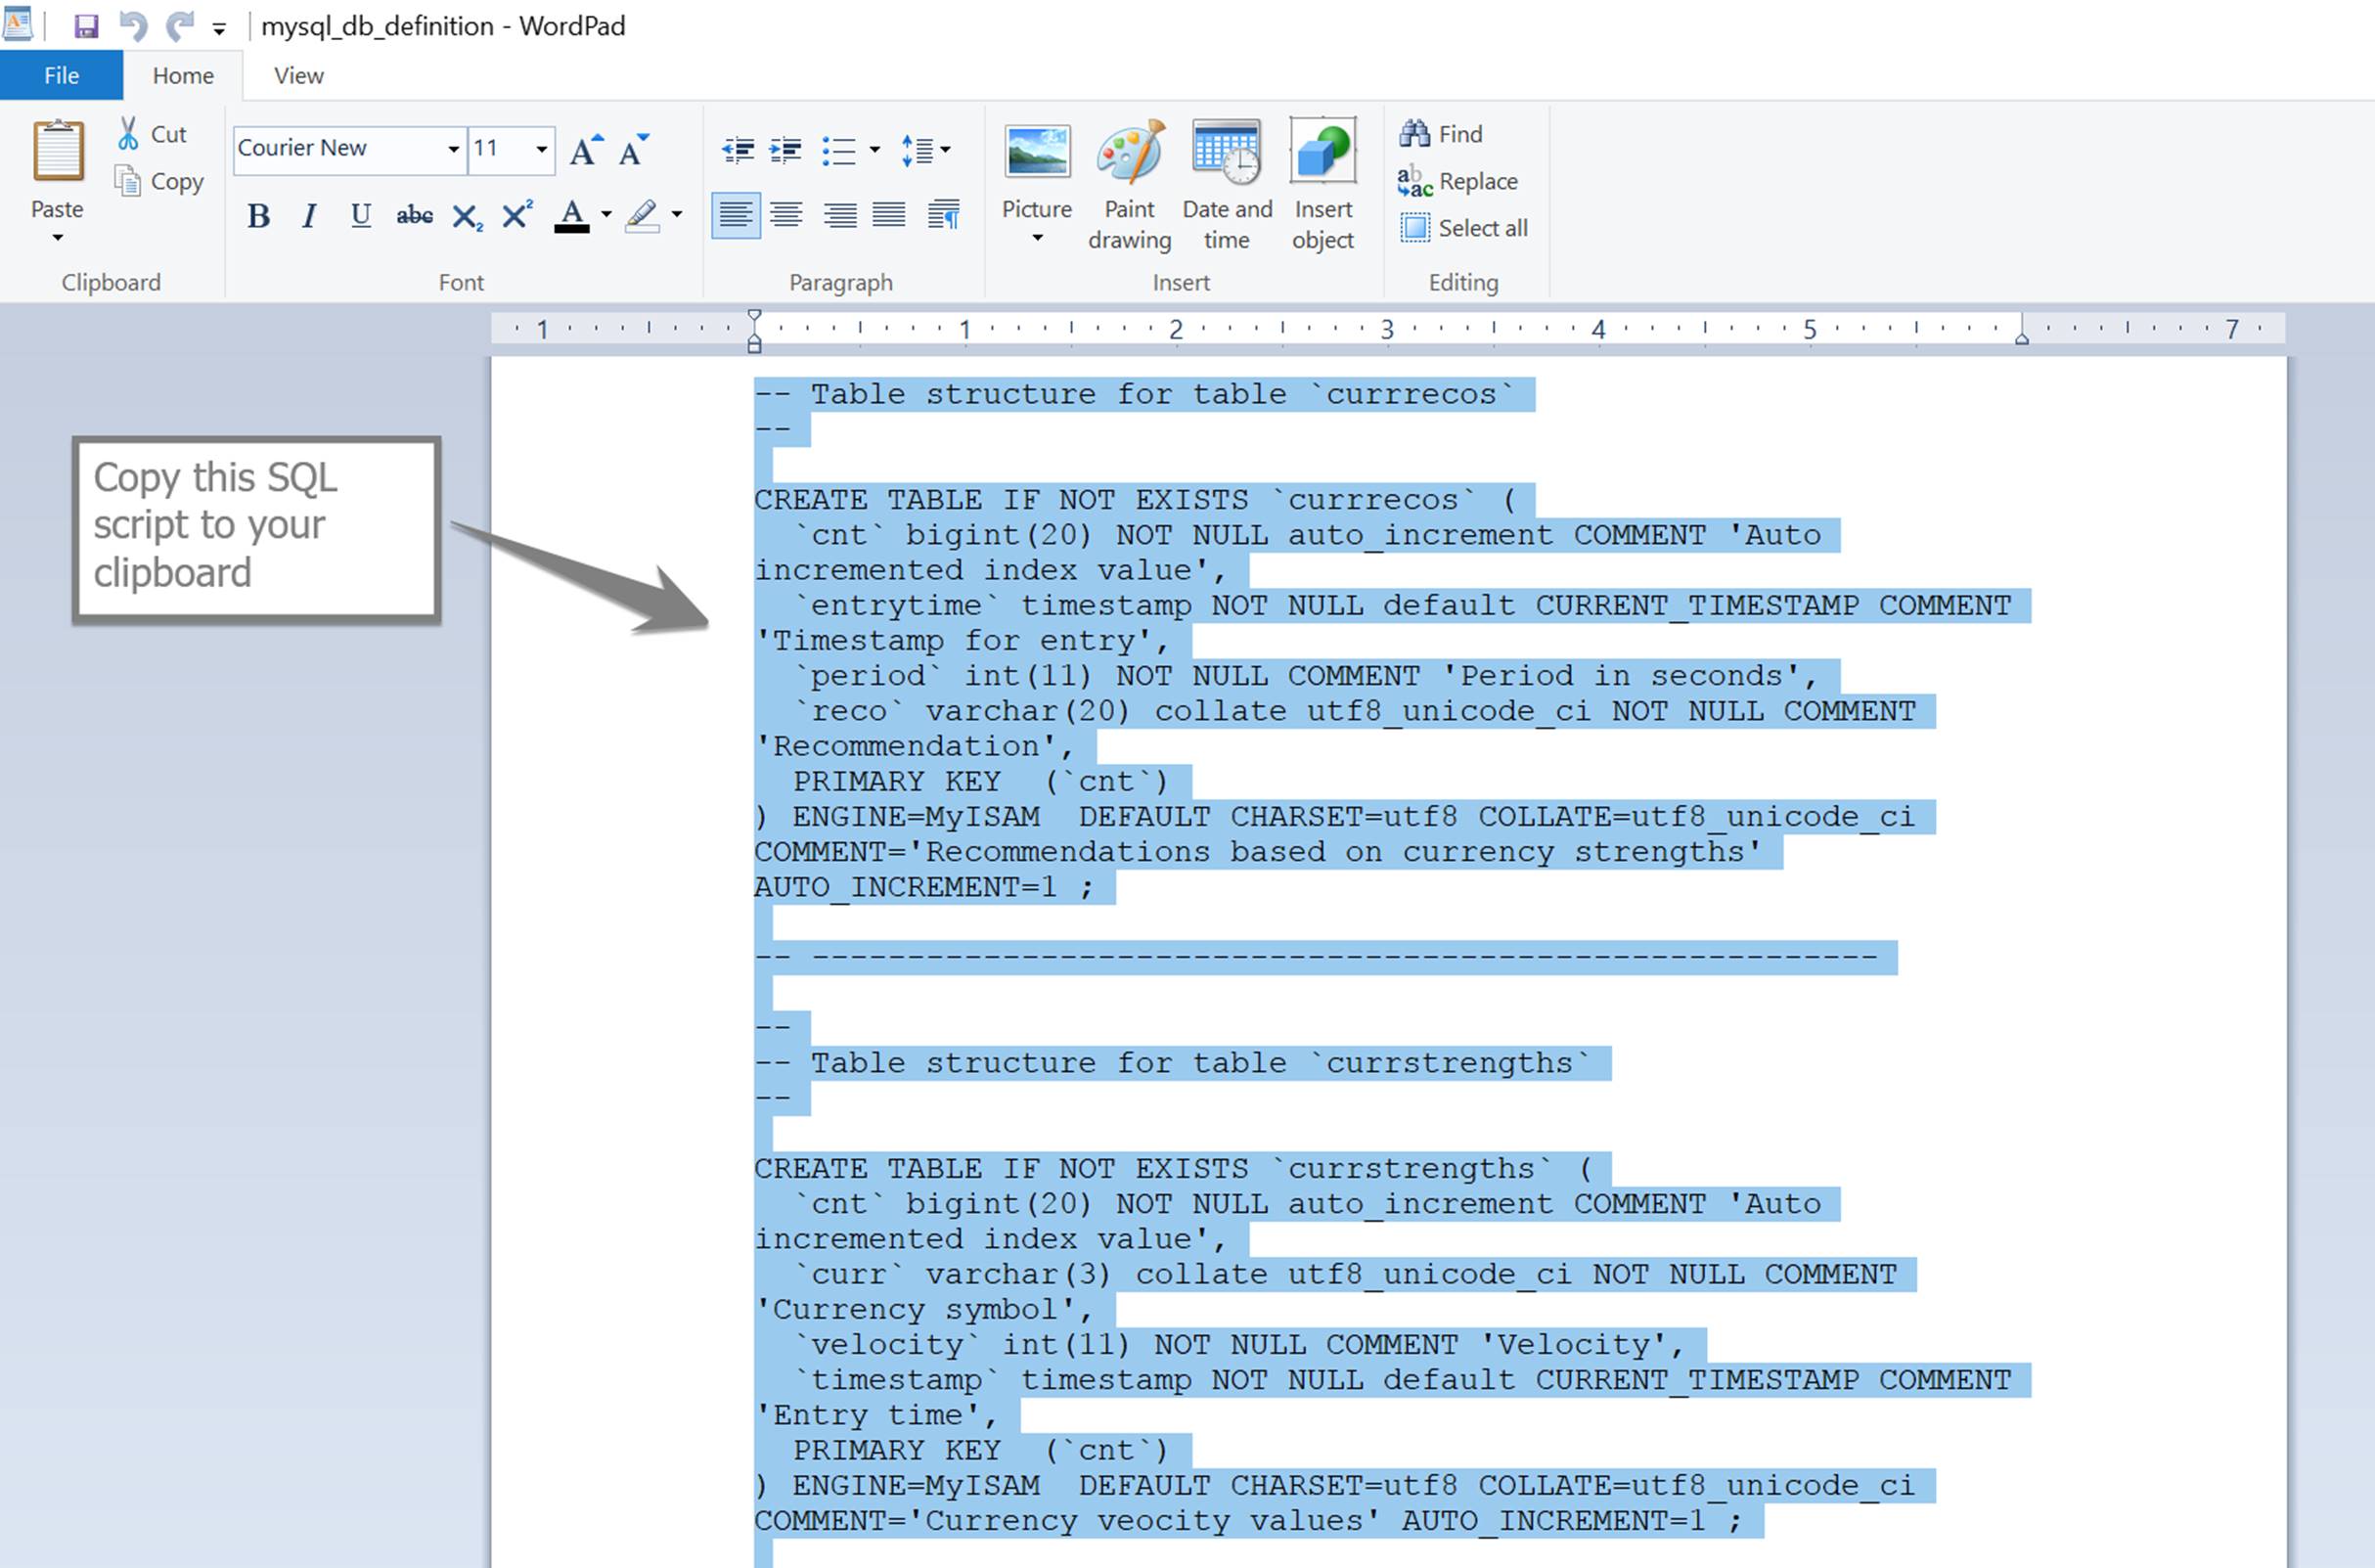
Now go back to the folder where you have unzipped the contents of the package that you downloaded at the start. In that folder, you will see the following .sql file.
Open the .sql file in any text editor of your choice and copy the code to clipboard.
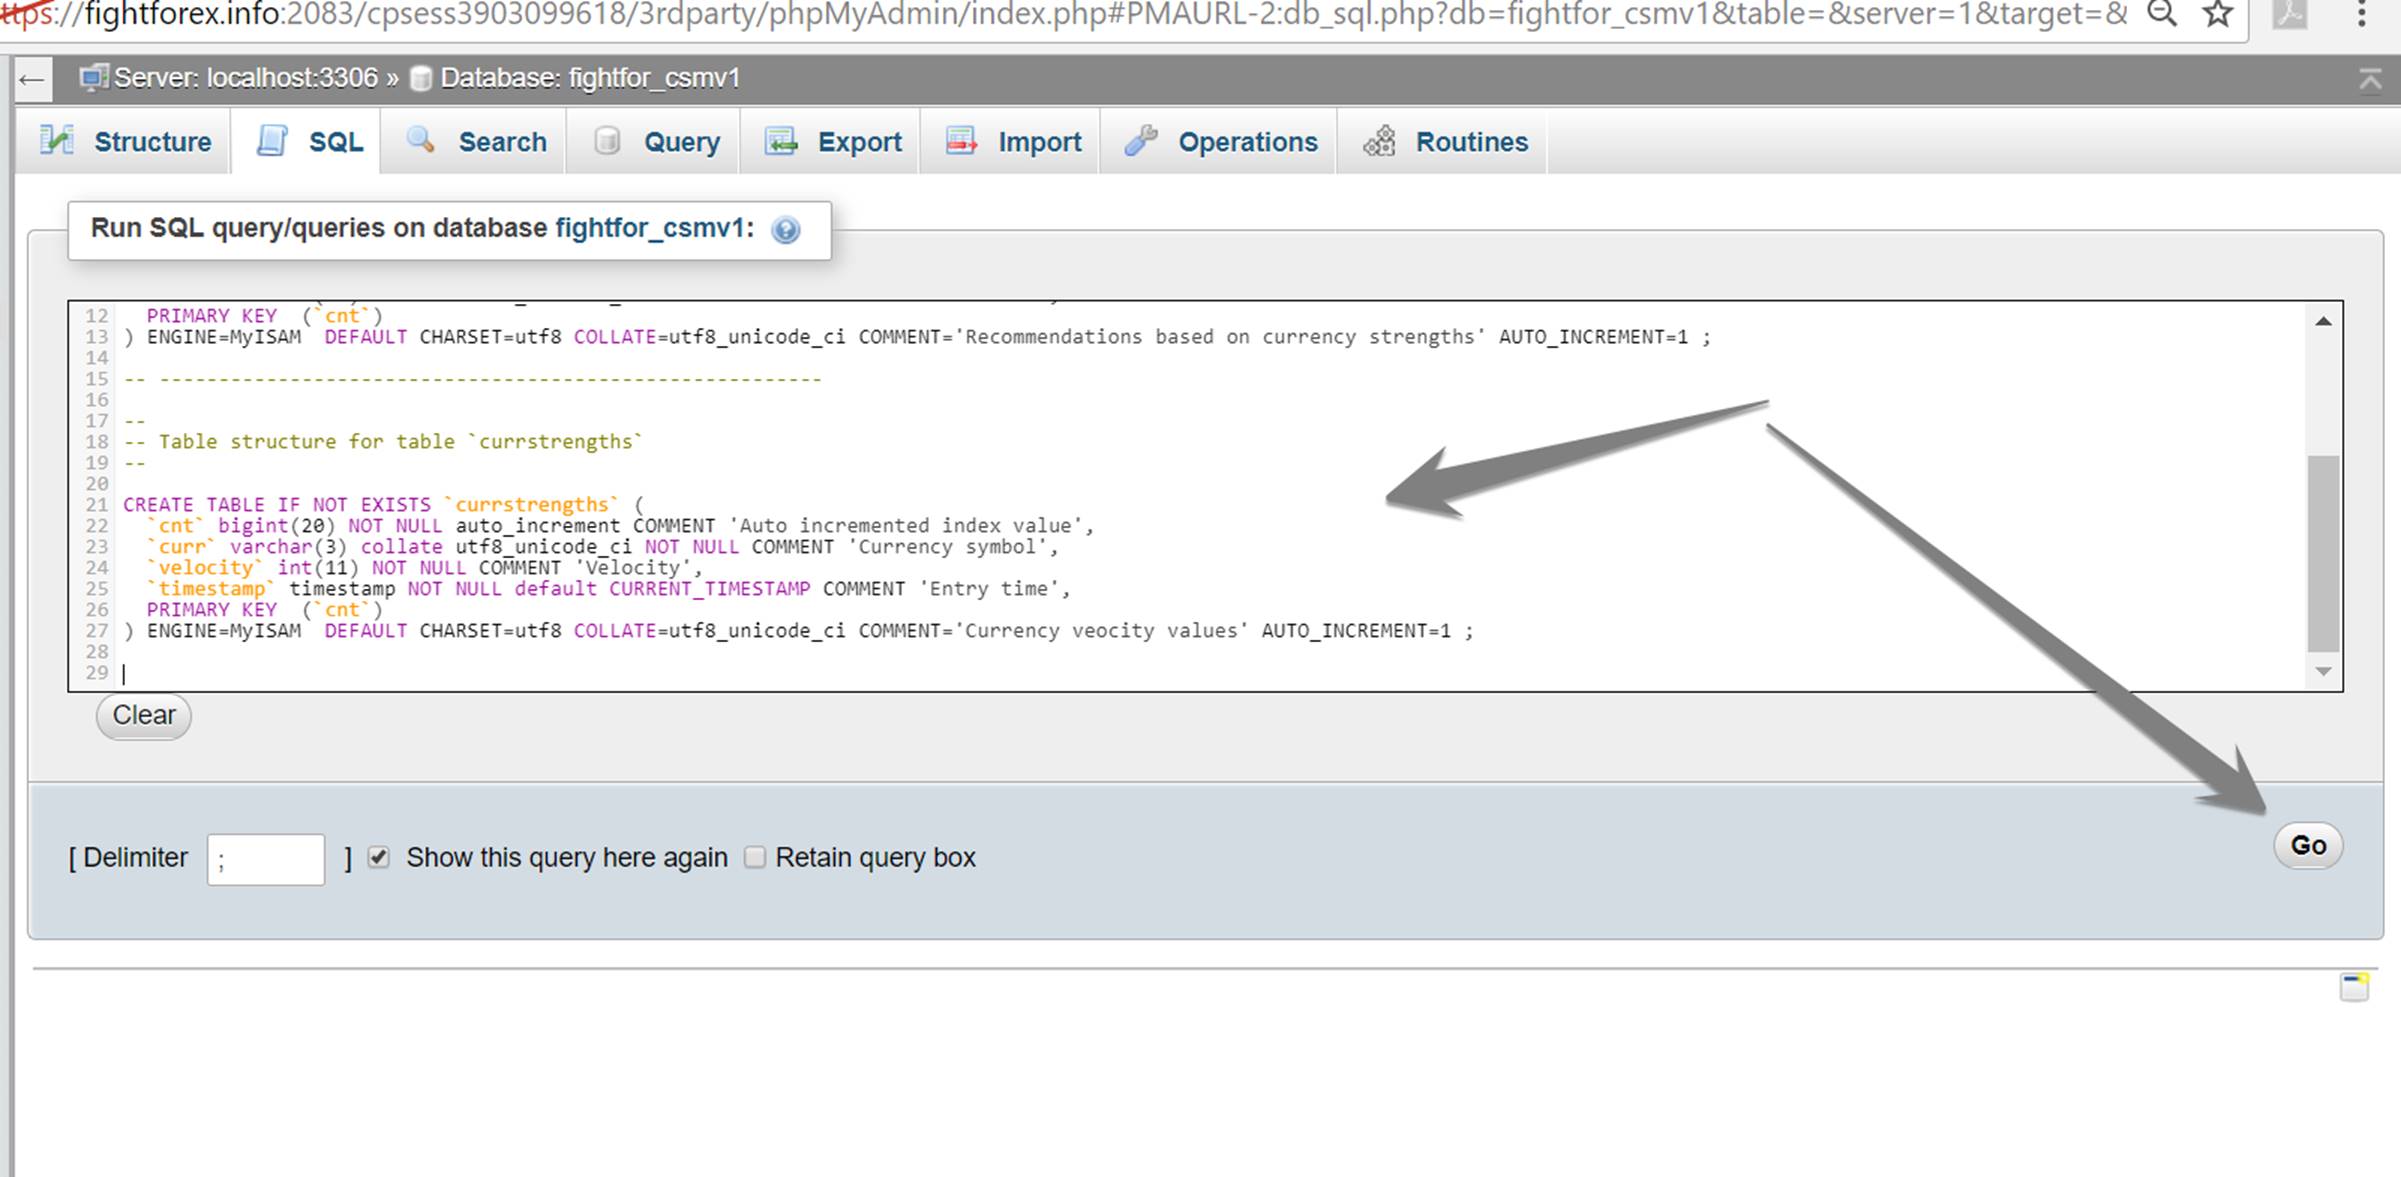
Paste this code in the SQL editor tab in the database view as shown below and execute.
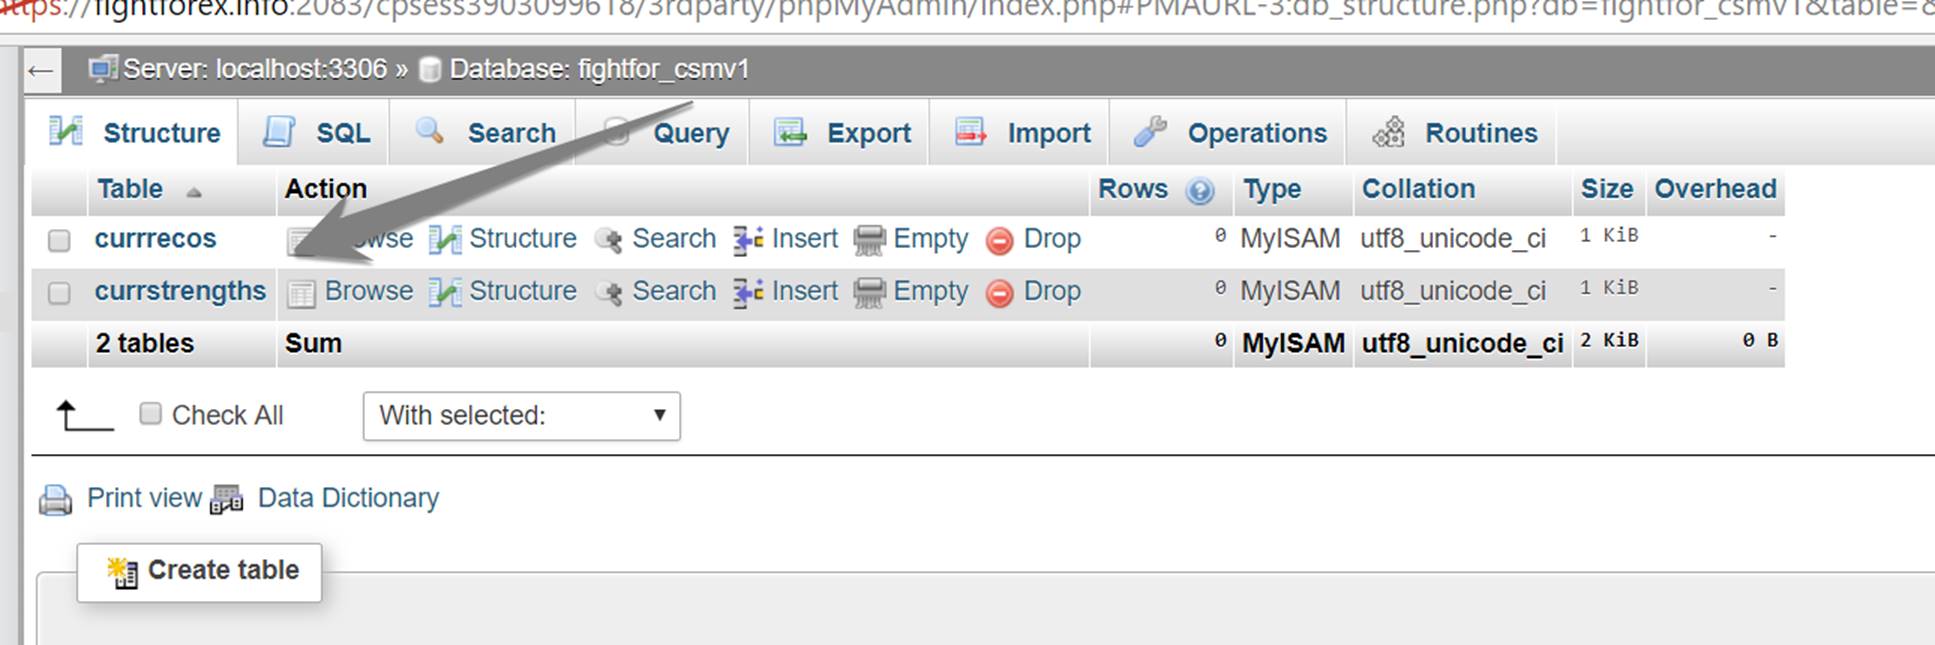
You should see two tables created once the script runs successfully.
Your database is now setup and ready to be used. Hope you still have the username and password you created to access this database.
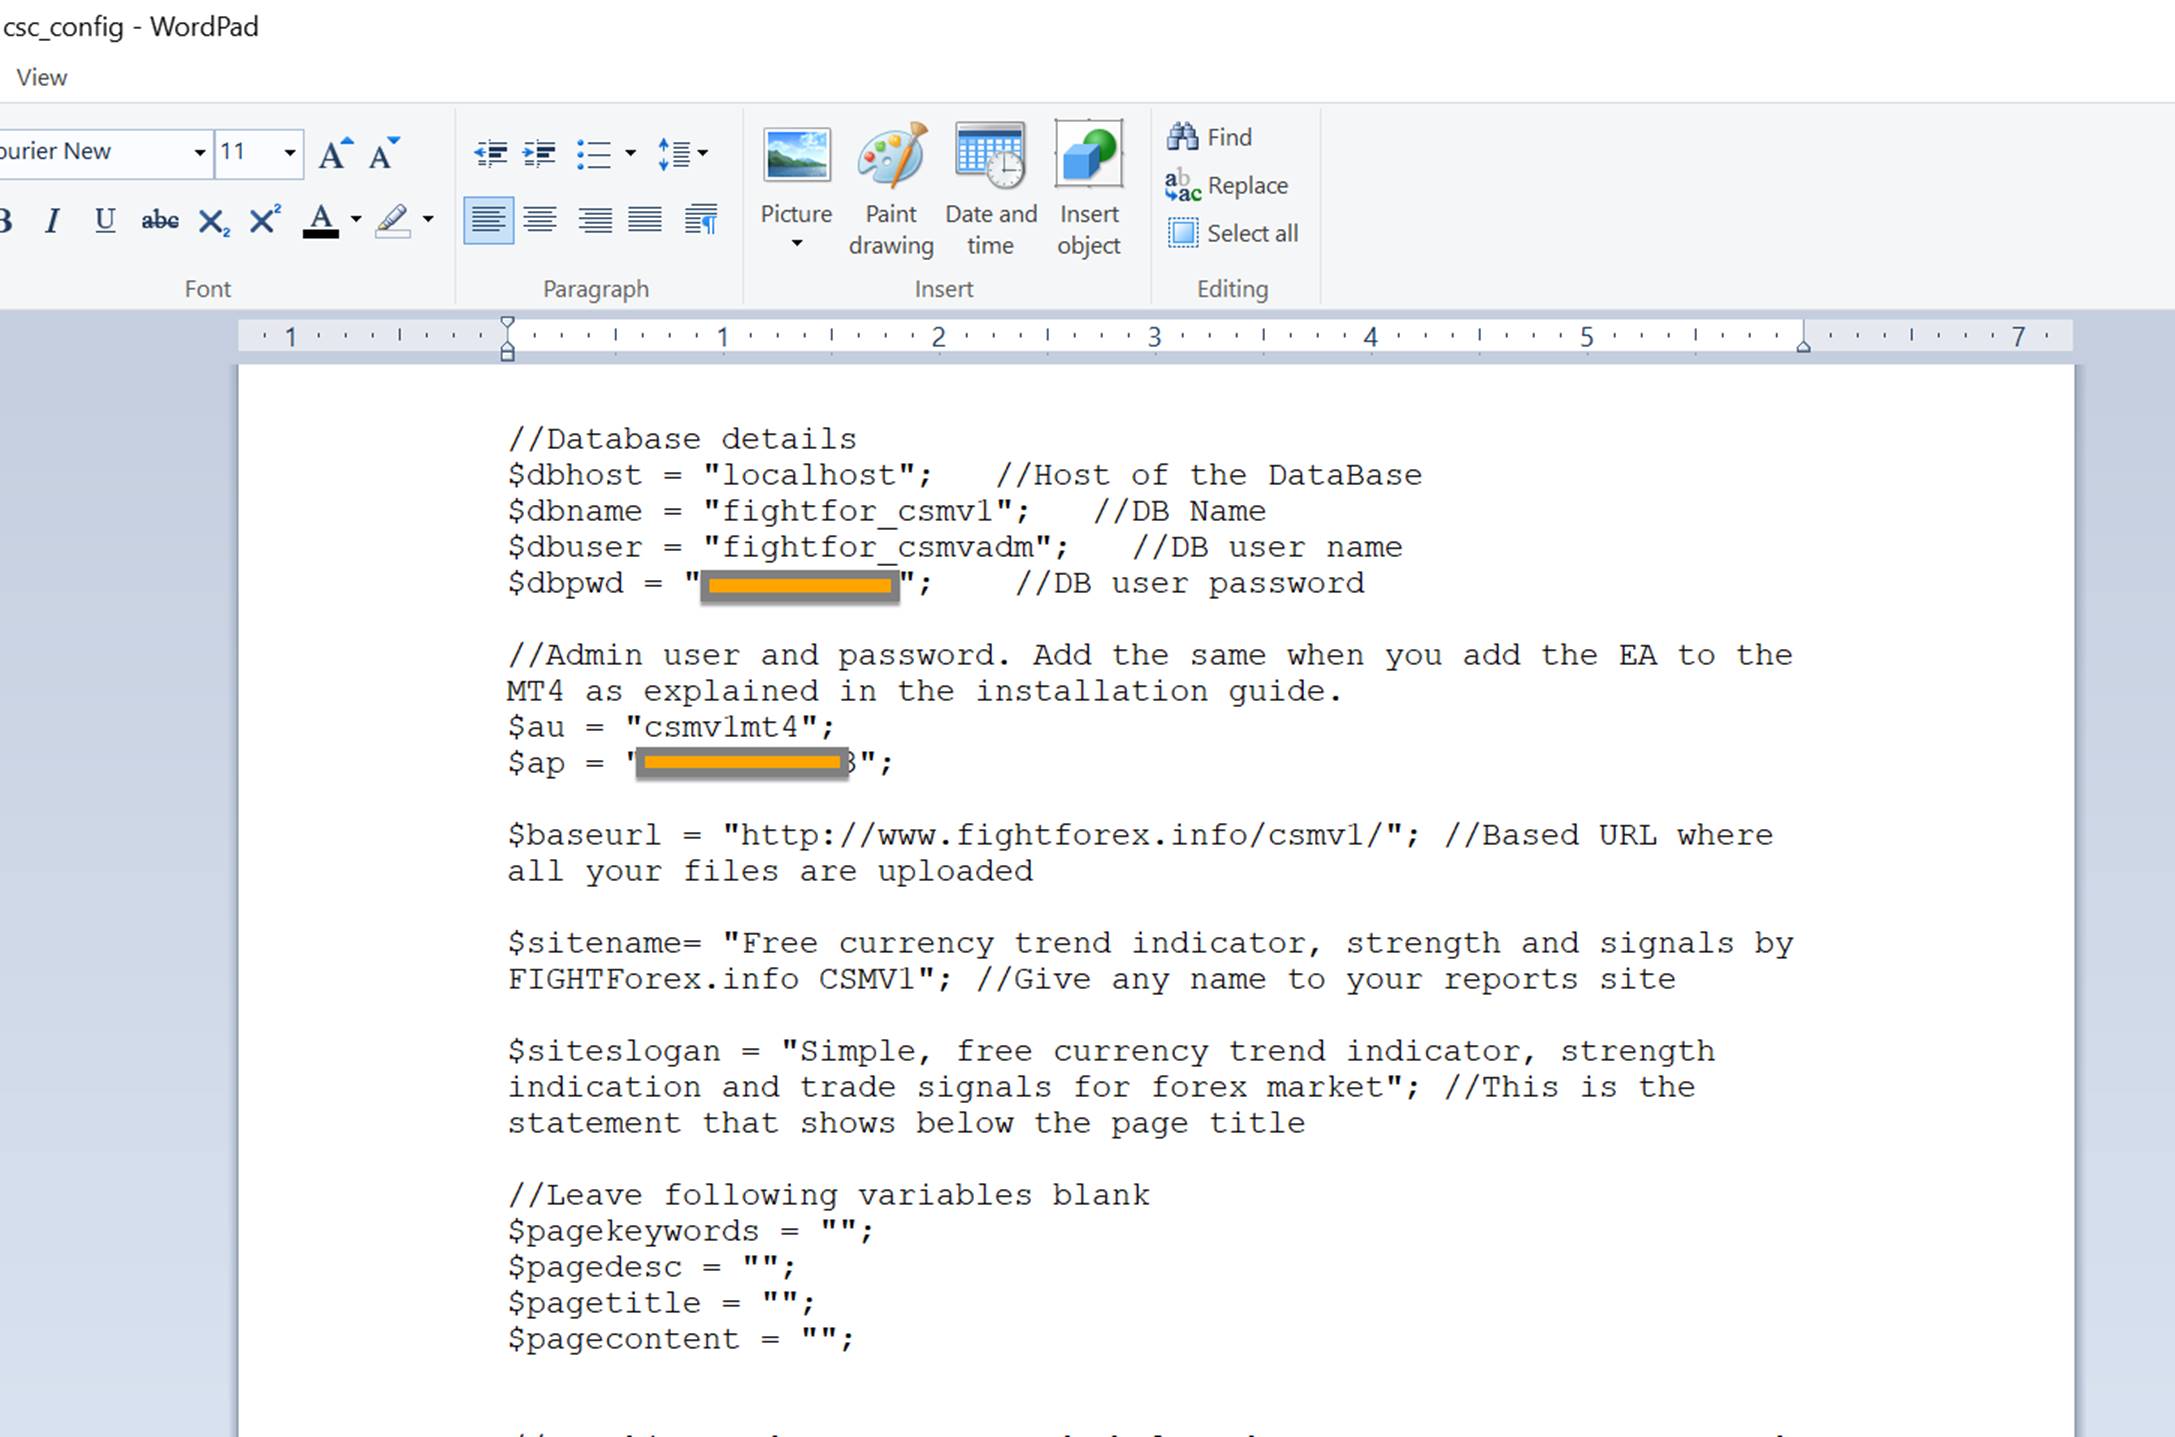
Step 4: Update the config file
Locate the config file in the folder where you have extracted all the files from the package.
Open the config file in the choice of your text editor.
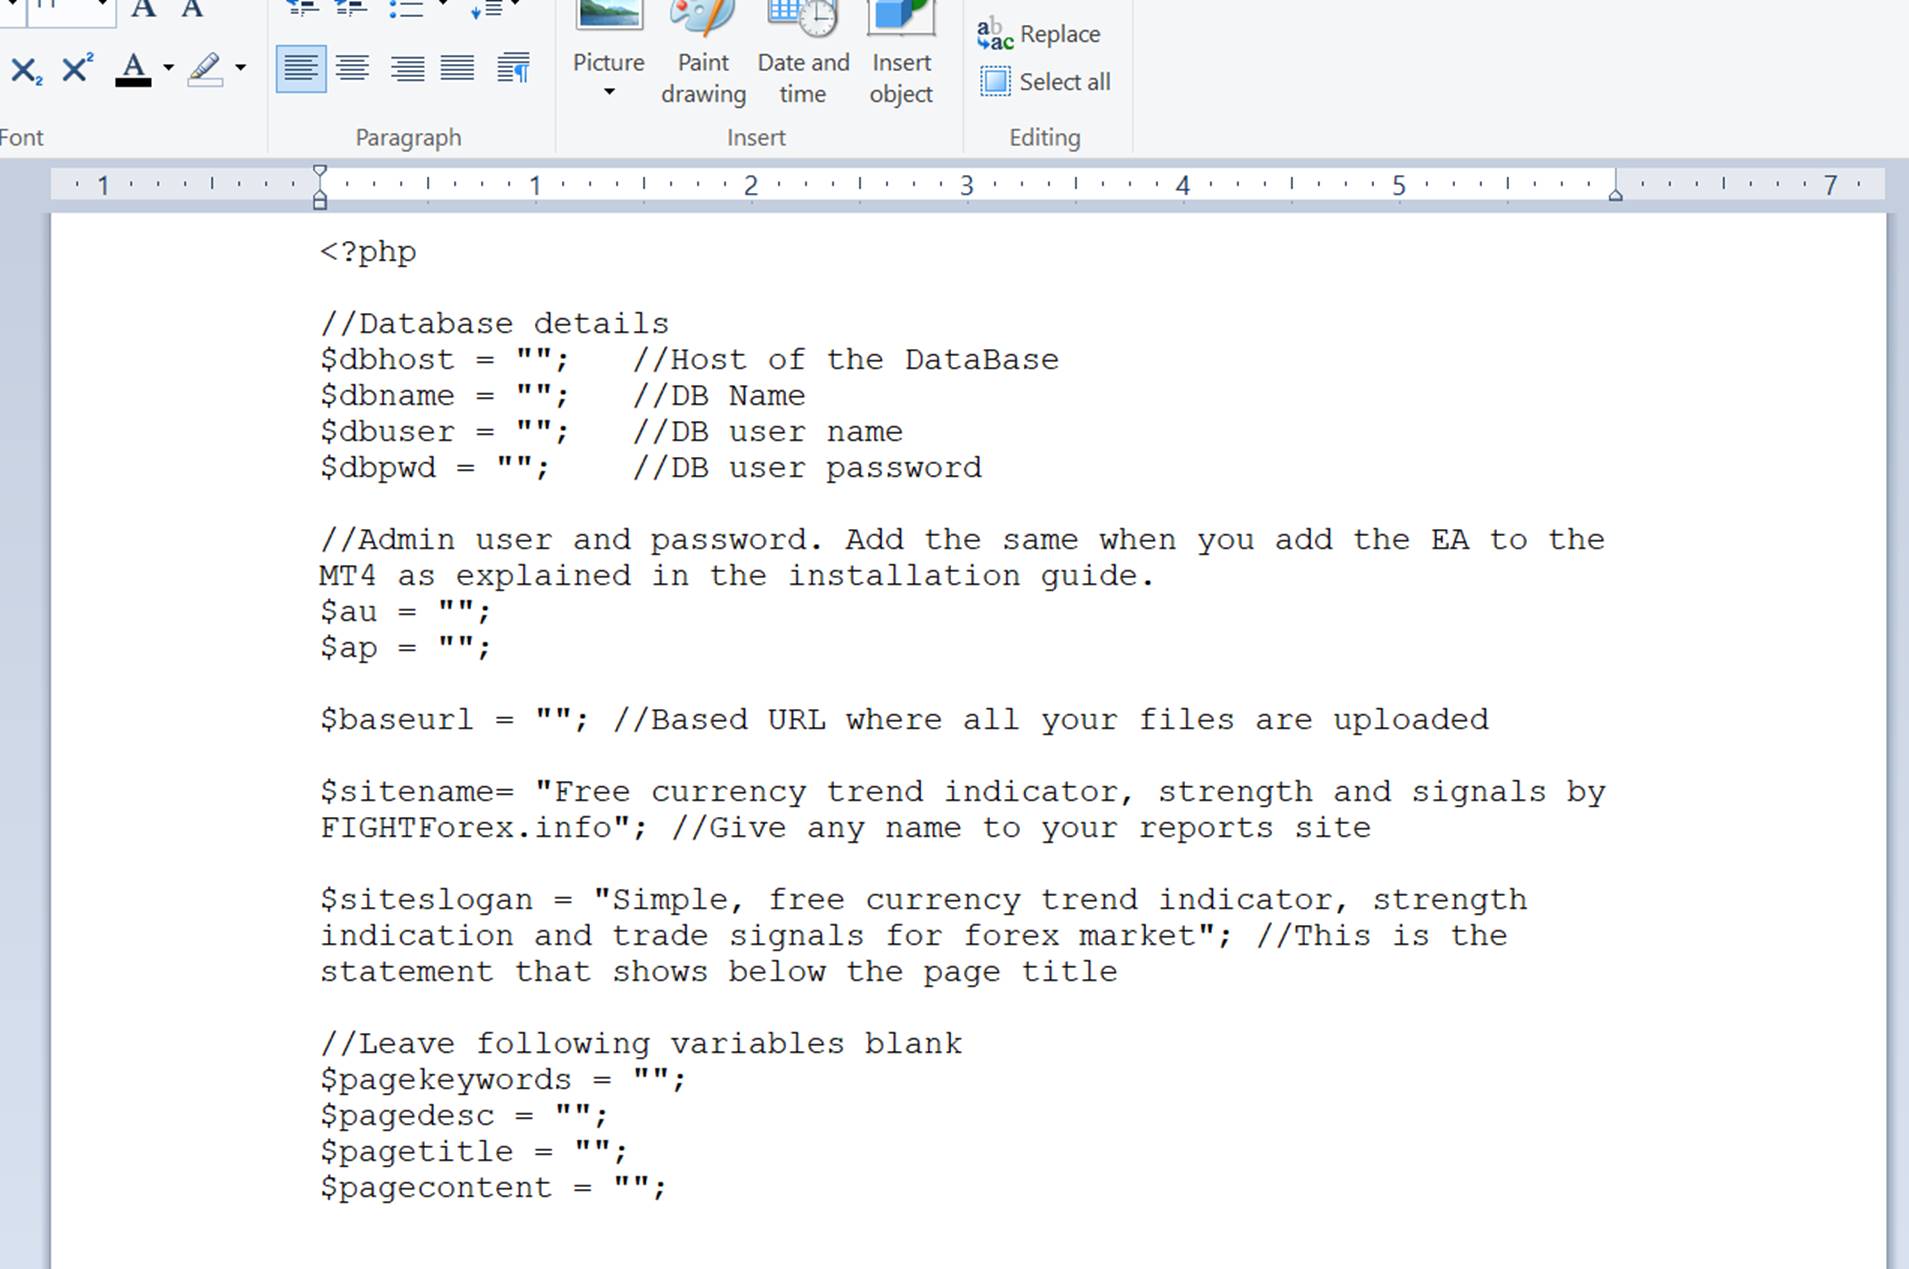
Update the variables carefully per the explanation given next to each variable. First set of variables is the database connection details that you noted down when creating the database. Second set of username and password is something you pick to secure the communication between your MT4 EA and your website. This will be required later when you install the EA on your MT4. Once you update all variables carefully, the completed config file should look something like below.
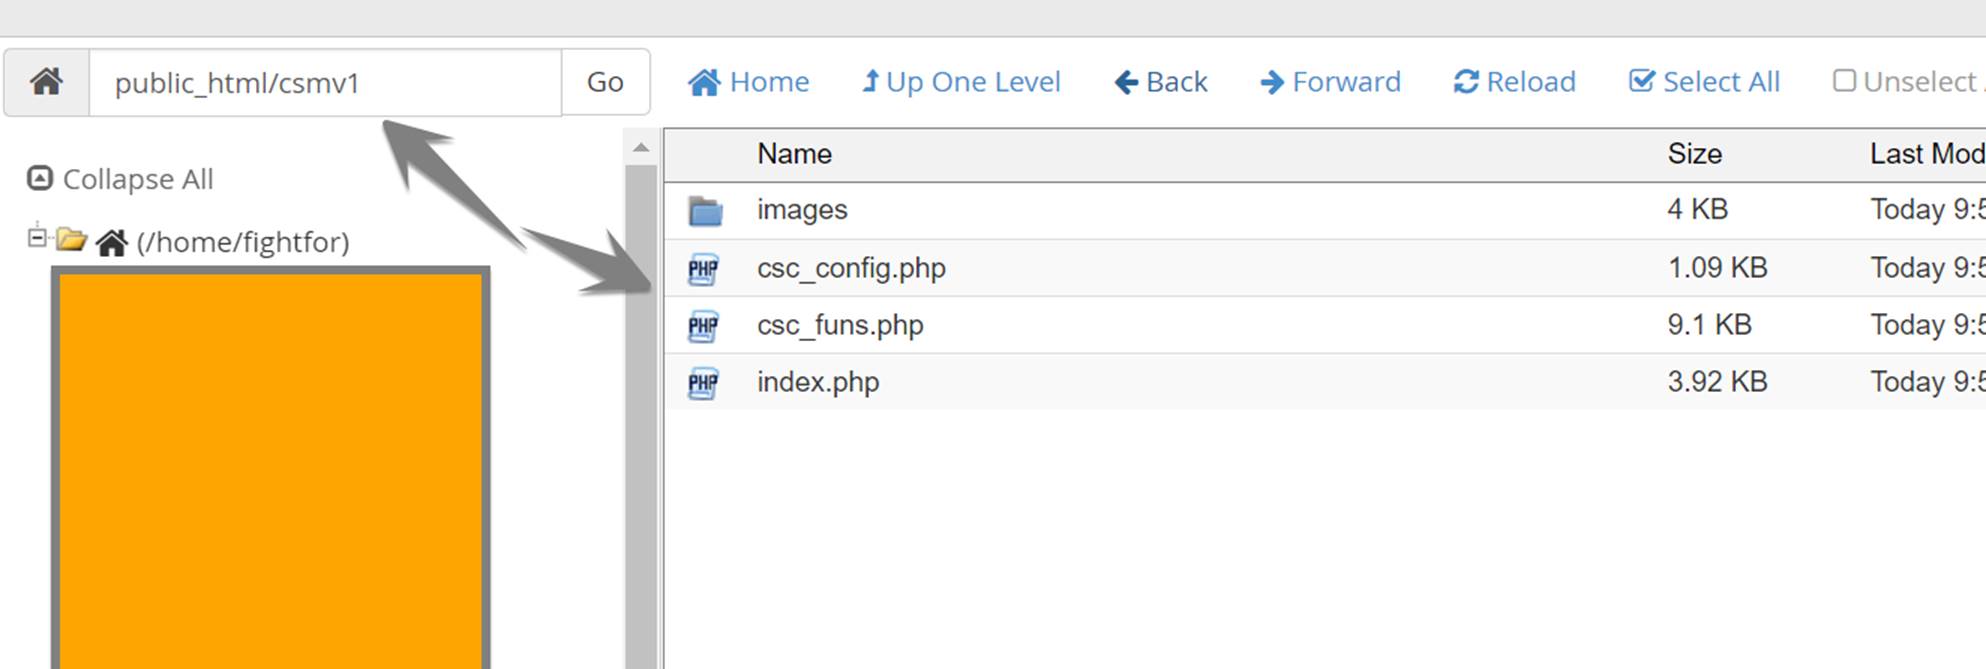
Step 5: Upload files on the web server
Create the folder on your web server where you want to upload all the php files. In this example, as shown in the screenshot below, we are uploading all files in the folder “csmv1”. Use any FTP client or method of your choice. Your web folder should look like this when you upload the files.
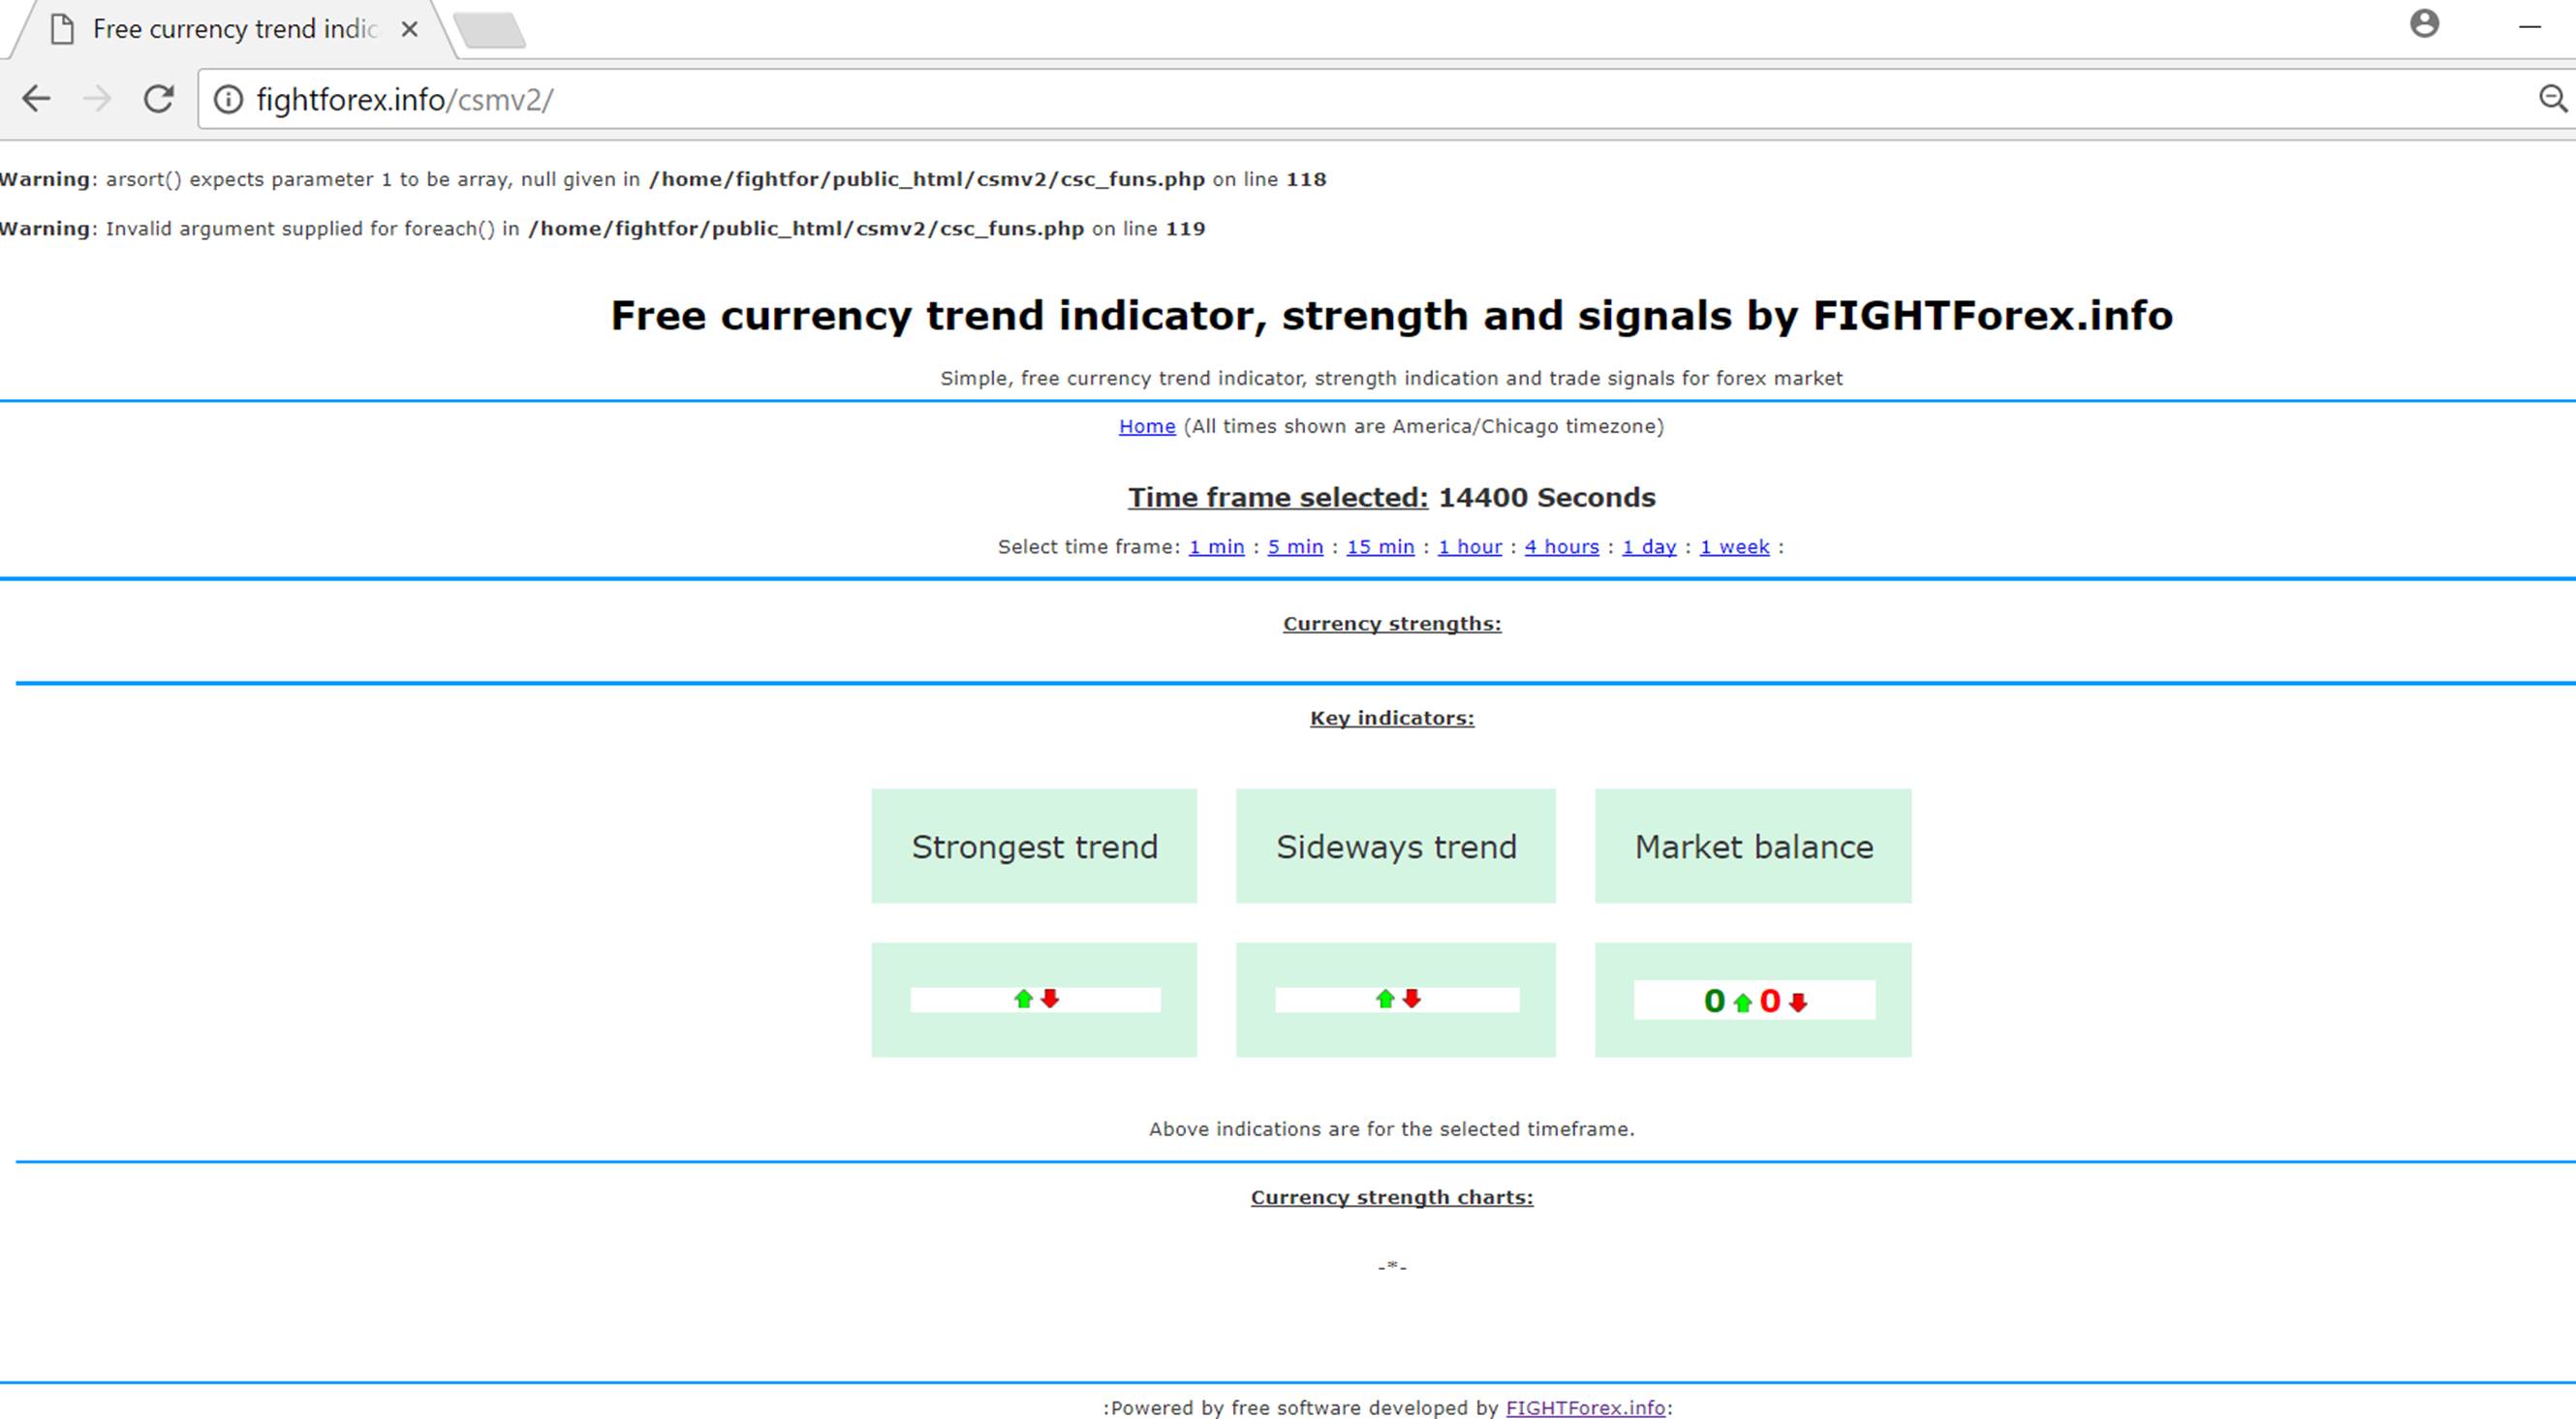
Verify that the setup is correctly working so far by going to the web address of the folder where you uploaded the files. You should see a screen similar to the one below. It is OK to get some warnings as shown in the screenshot below but make sure there are no errors. Especially database connection-related errors should be taken care if there are any.
Step 6: Setup EA in MT4
Now we move to the next very important step of the setup where you run the EA given with this package on your MT4 running on your VPS. This EA will keep sending currency strength values to your web server every few minutes. This data coming in from MT4 is at the heart of this currency strength meter setup. Please read through these steps carefully and ensure accurate setup.
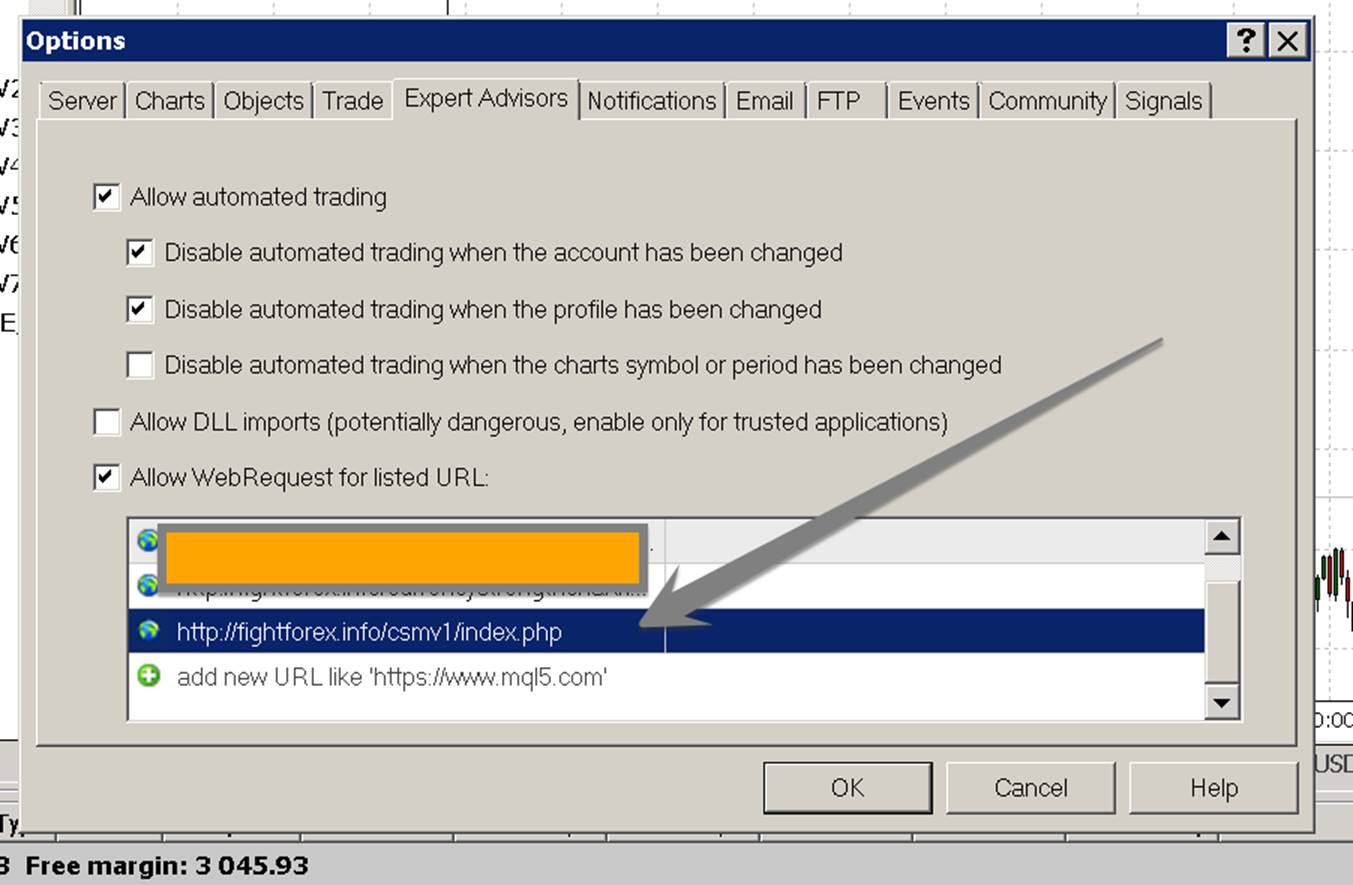
Before you add the EA to your charts, you need to add the newly create website URL to the “Allowed URLs” list in your MT4. This can be done under “Tools -> Options -> Expert Advisers” menu option. It should look like below once you add the URL. Don’t forget to add the correct URL to your own website. The one shown below is to my site.
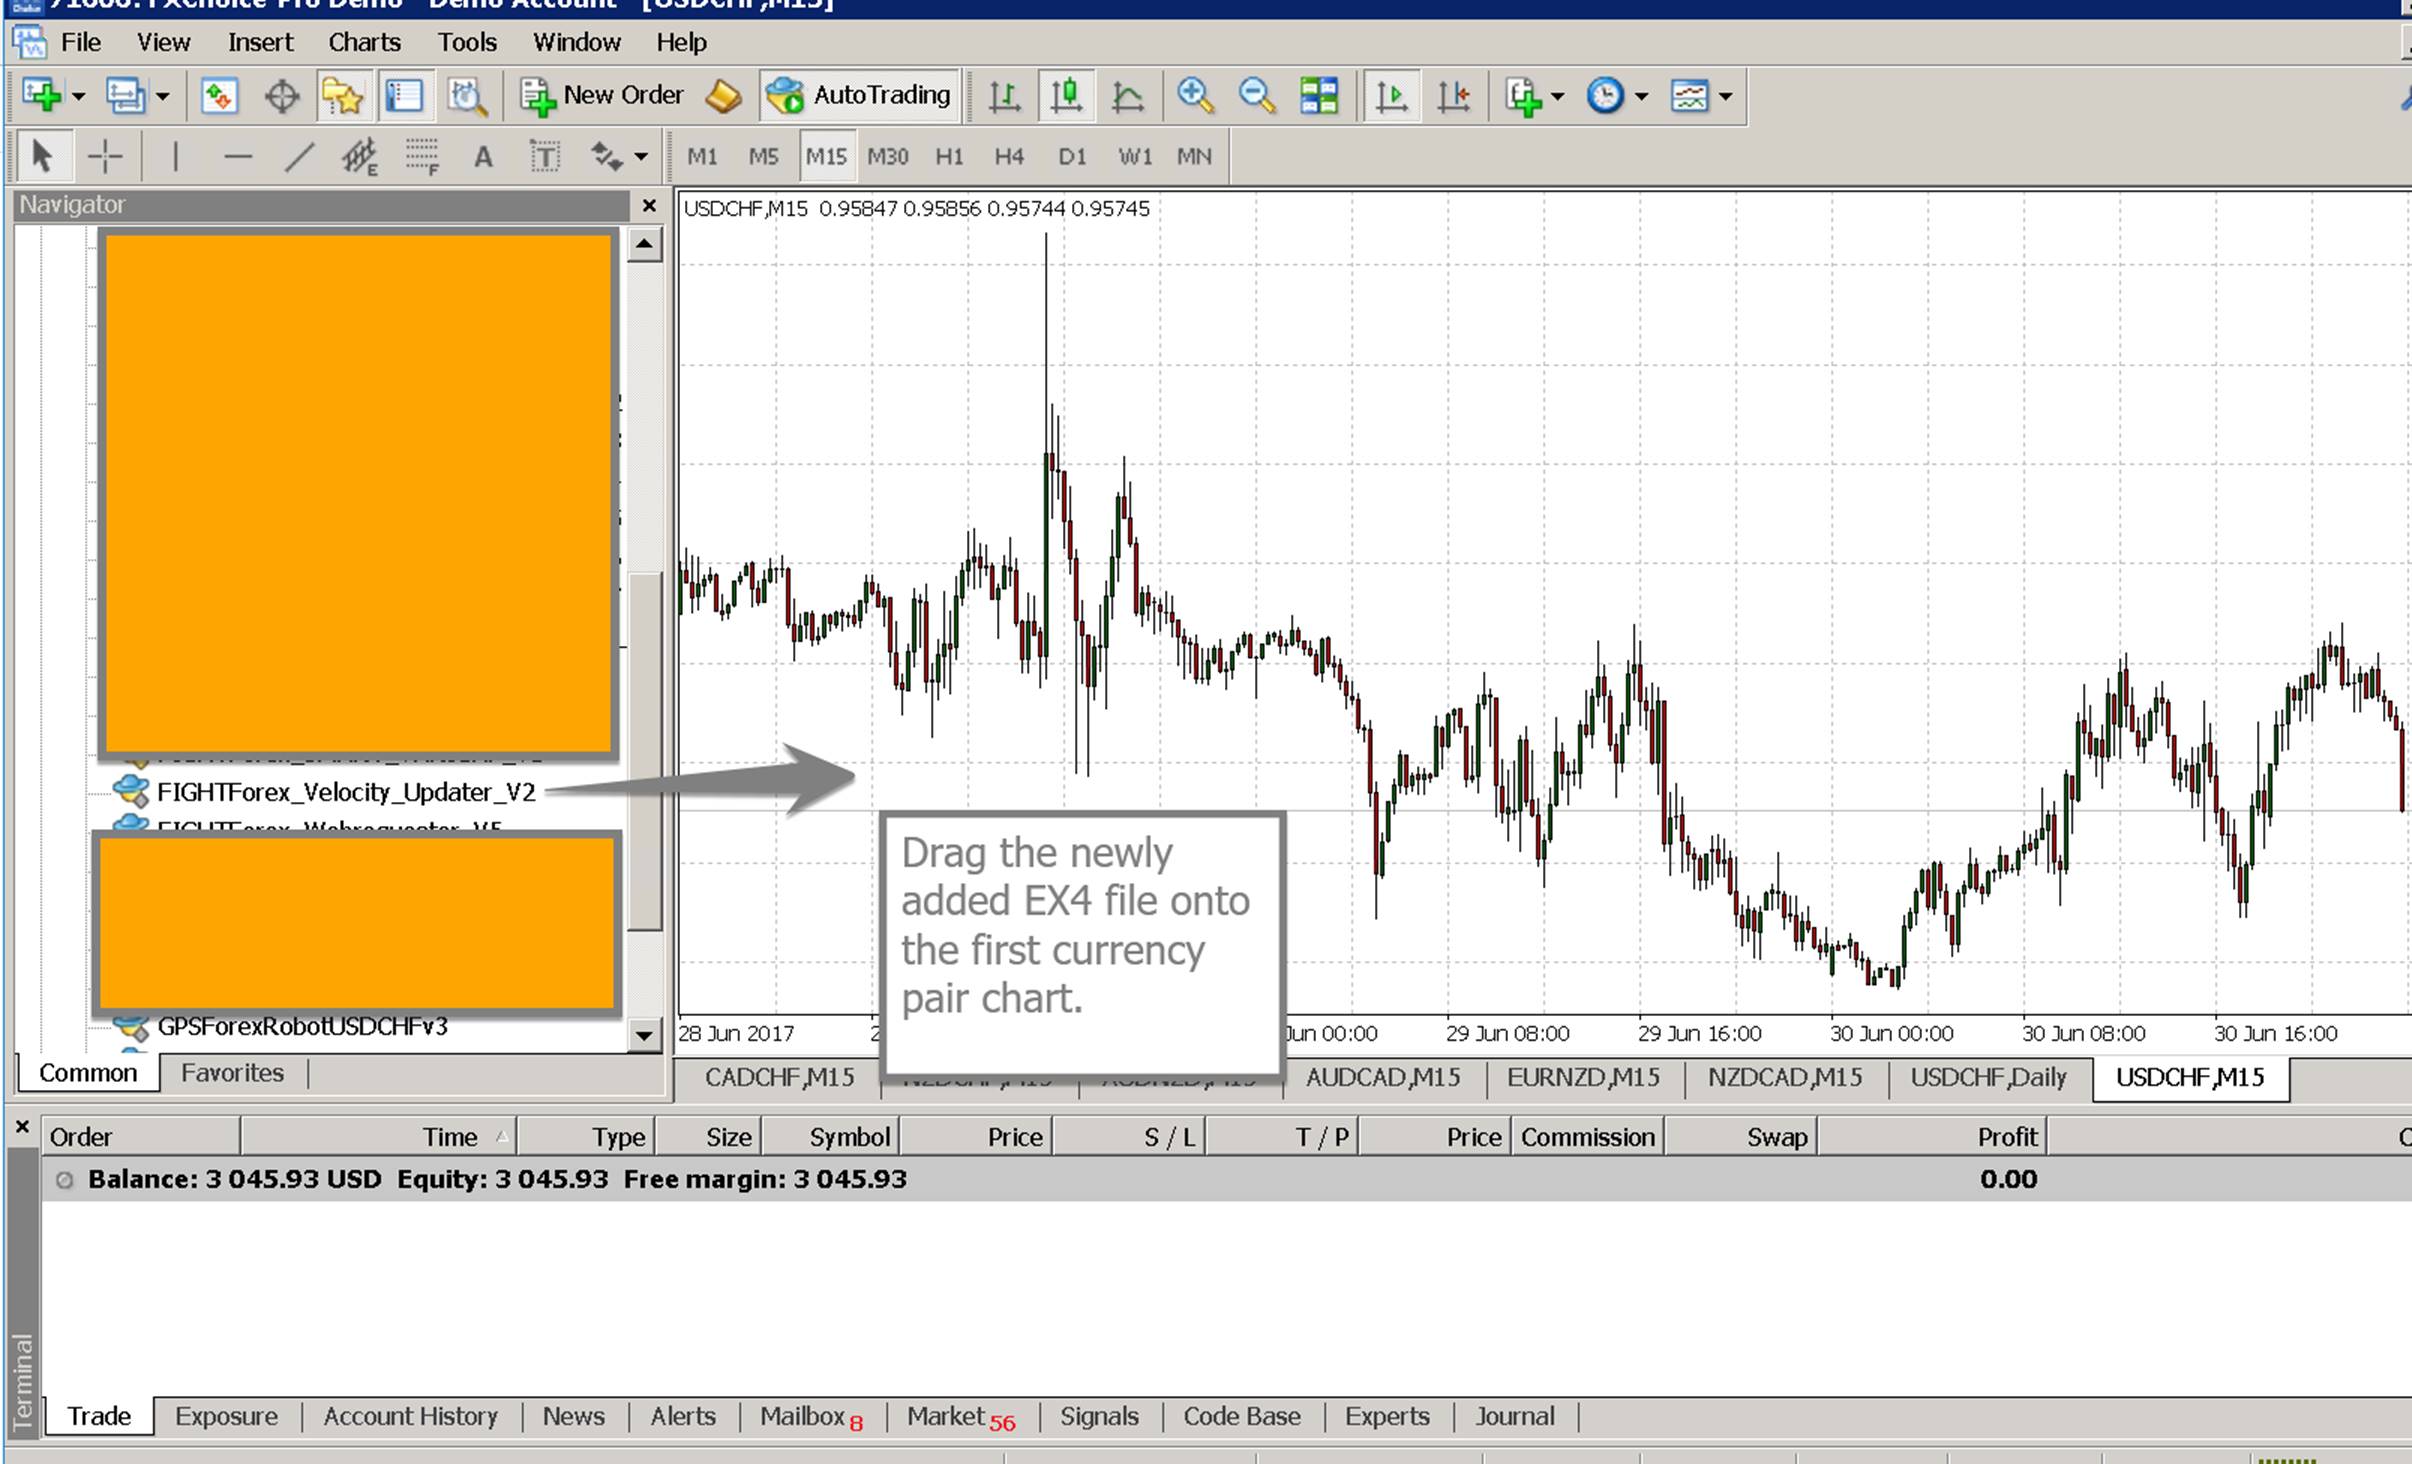
Next step is to add the EA to all the currency charts on your MT4.
Locate the .EX4 file given with the package.

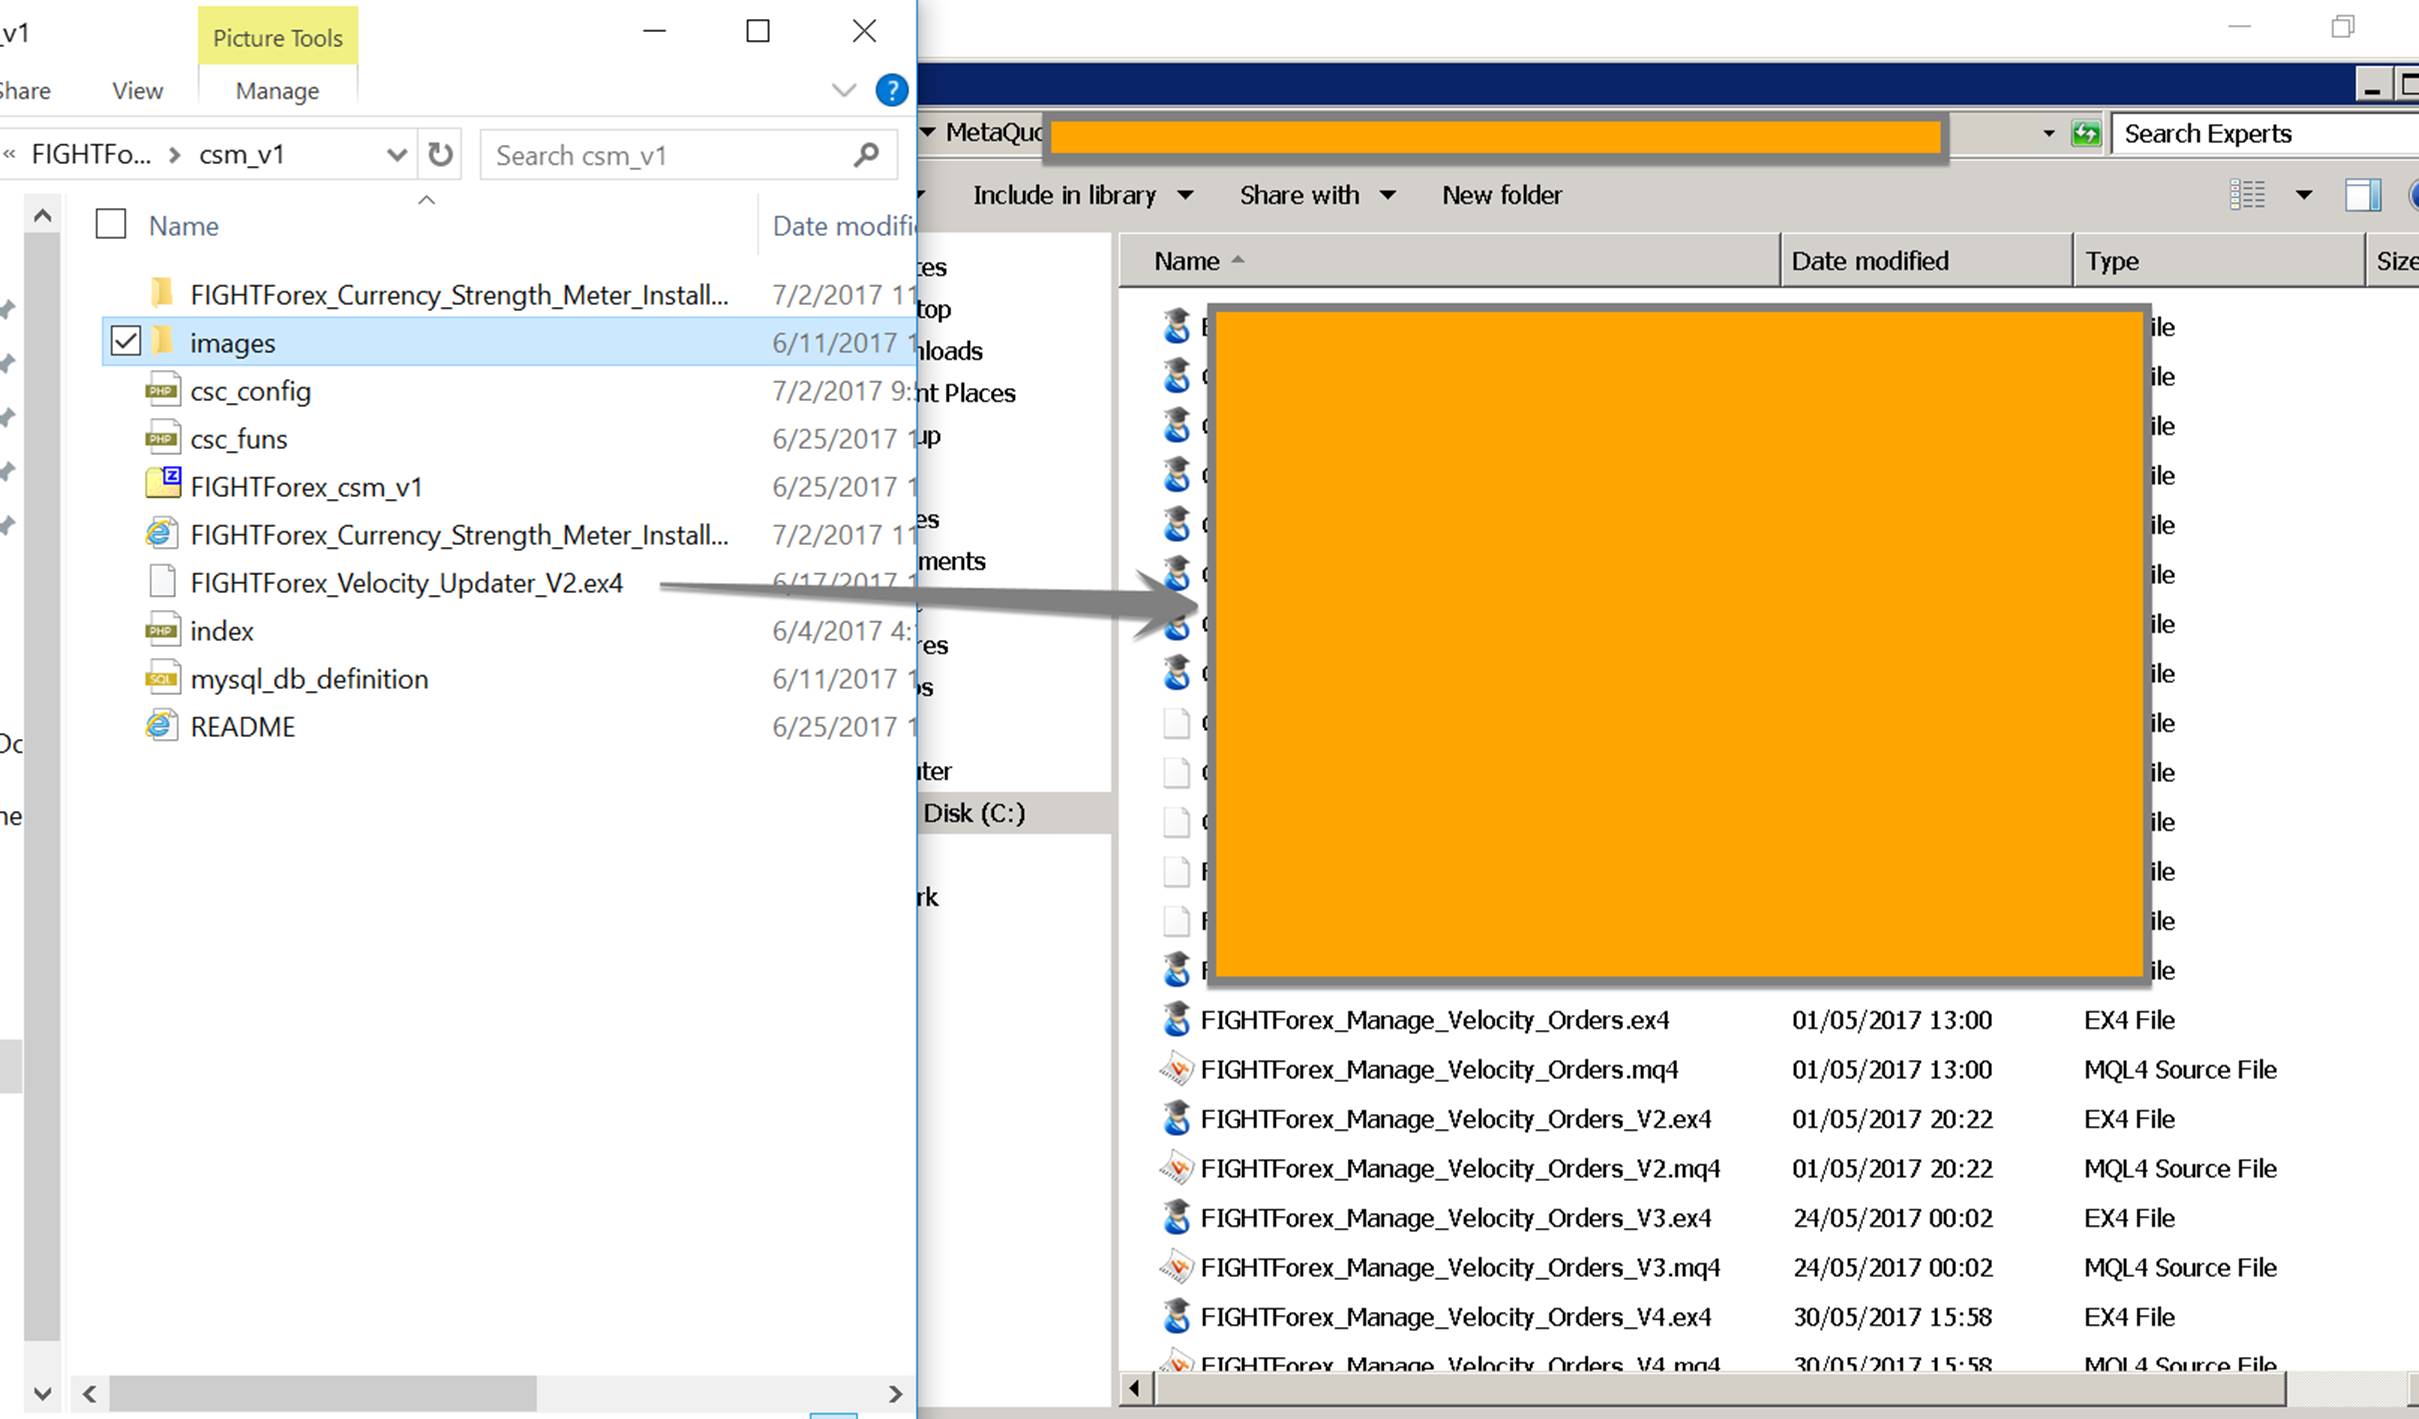
Open the MT4 on your VPS and open the folder where all your EX4 EA files are stored. For this, open your “Metaeditor” and then go to the folder where EAs are stored.
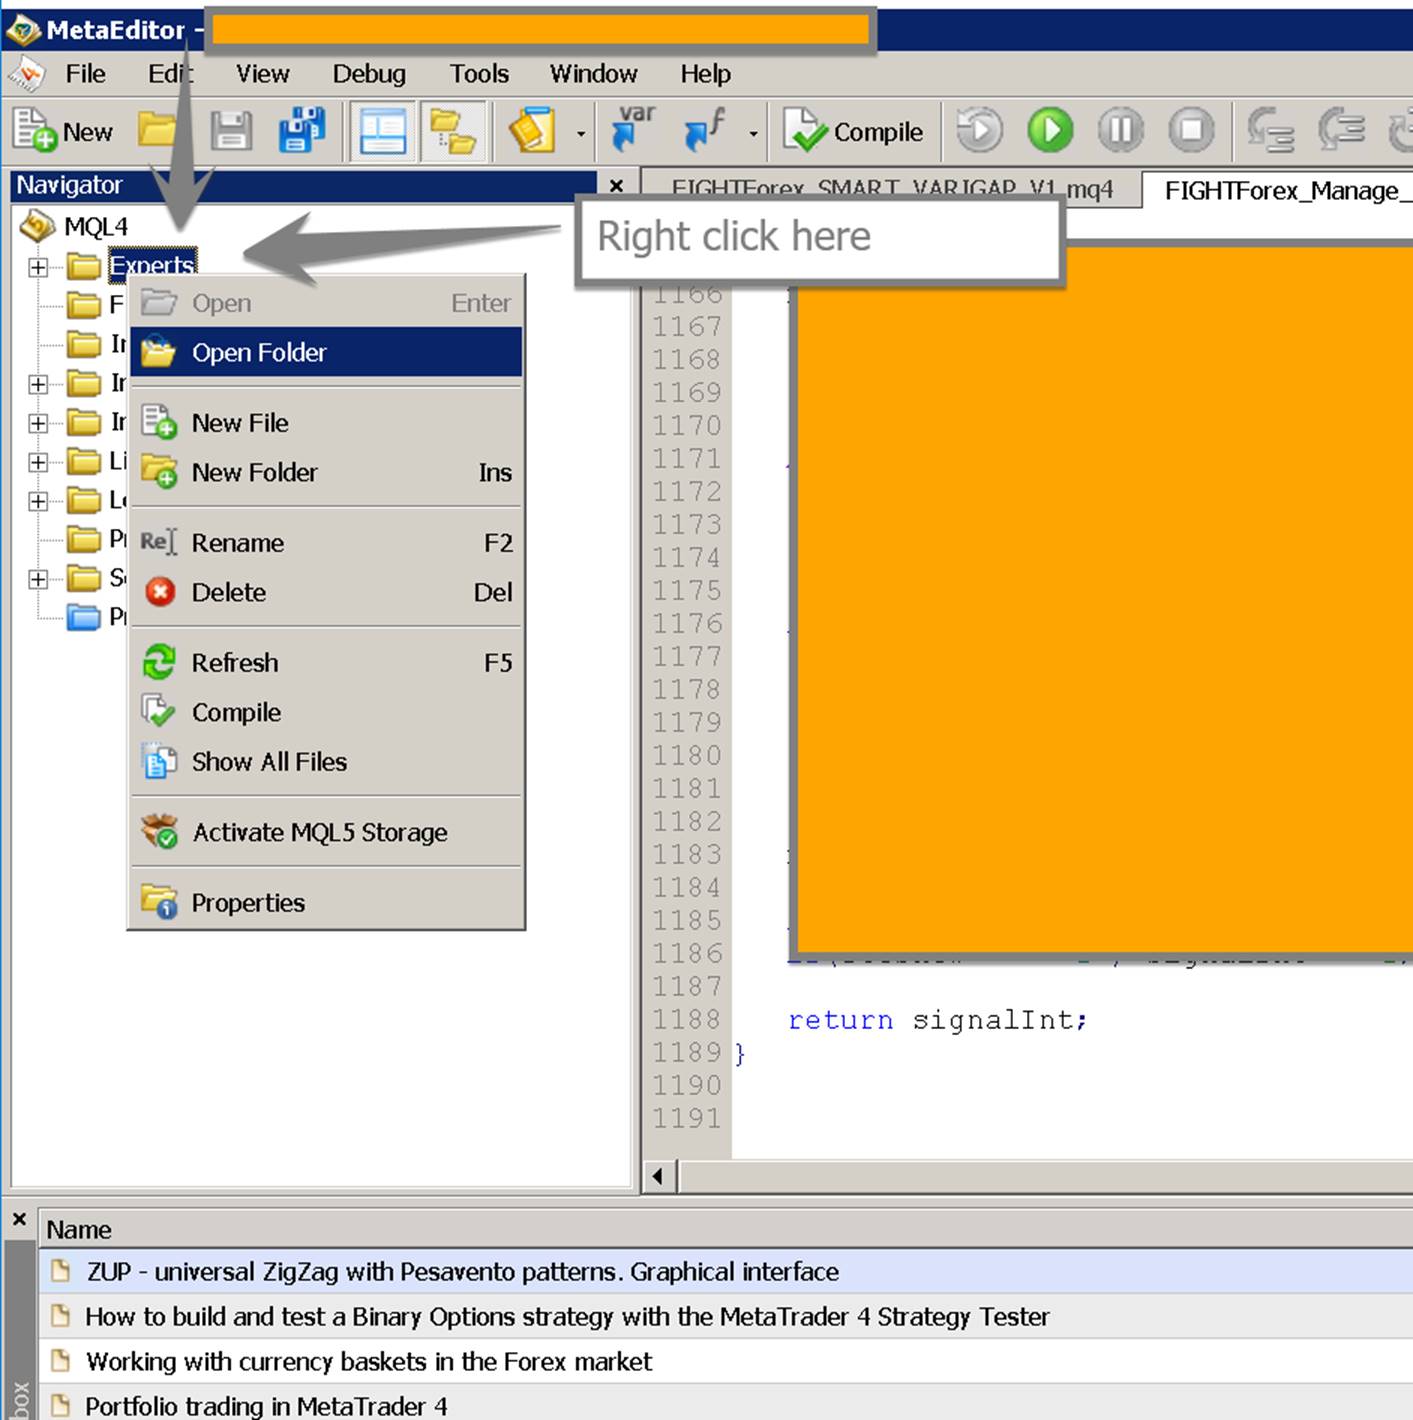
Copy the EX4 file given with the package in this folder.
Add the newly added EA onto a chart. Following screenshots show how to update the input parameters.
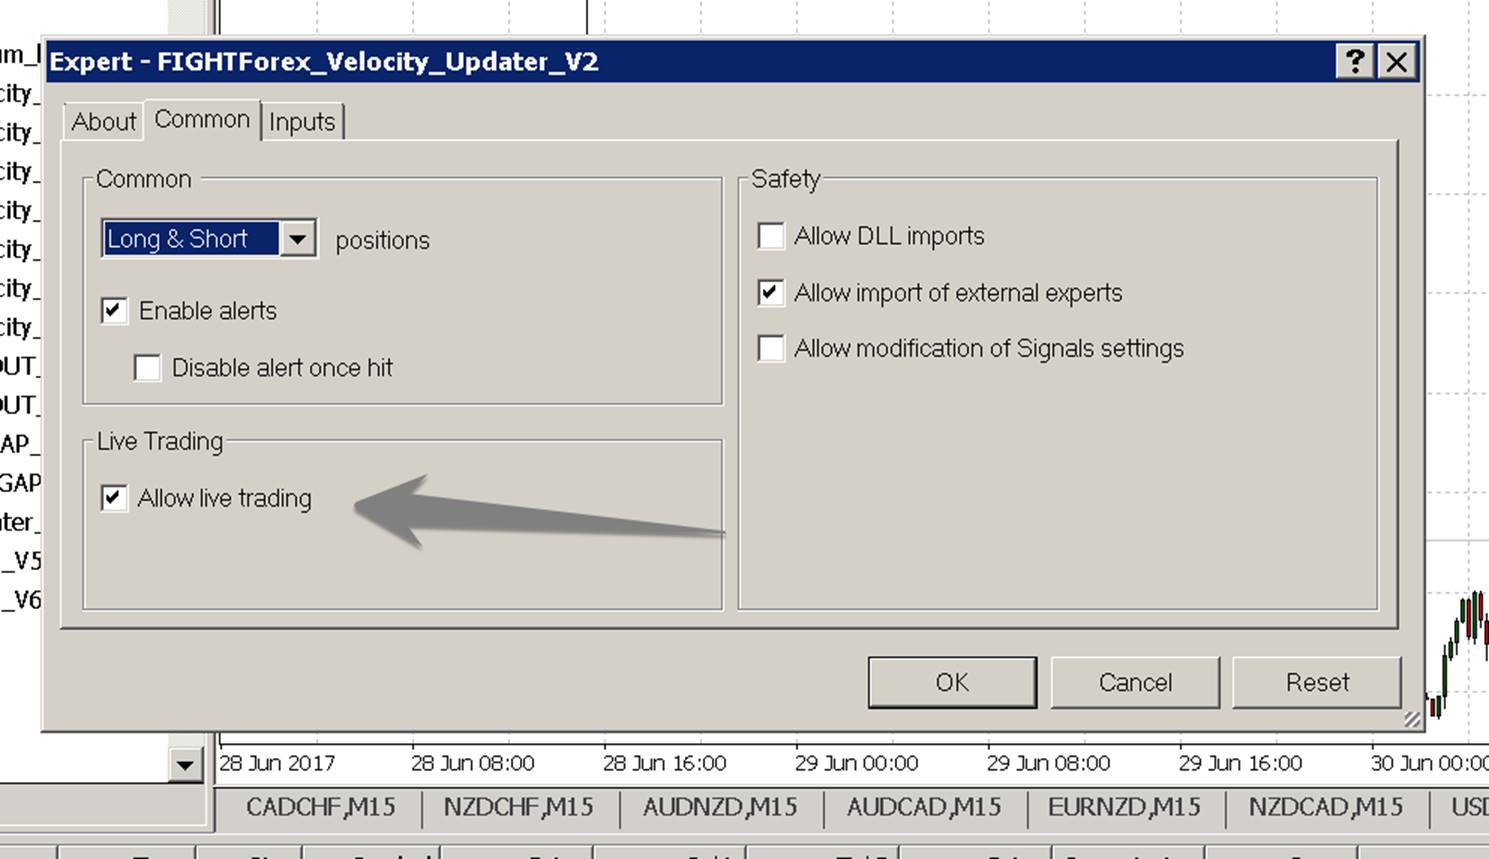
You need to click the checkbox that says, Allow Live Trading.
Setup all the inputs parameters as shown below.

Once your EA is added to the chart and running properly, you will have to wait twice the number of seconds that you put in the update frequency parameter to see the actual updates being sent. However, once the EA starts sending updates to your server, you should see a log similar to the one shown below.
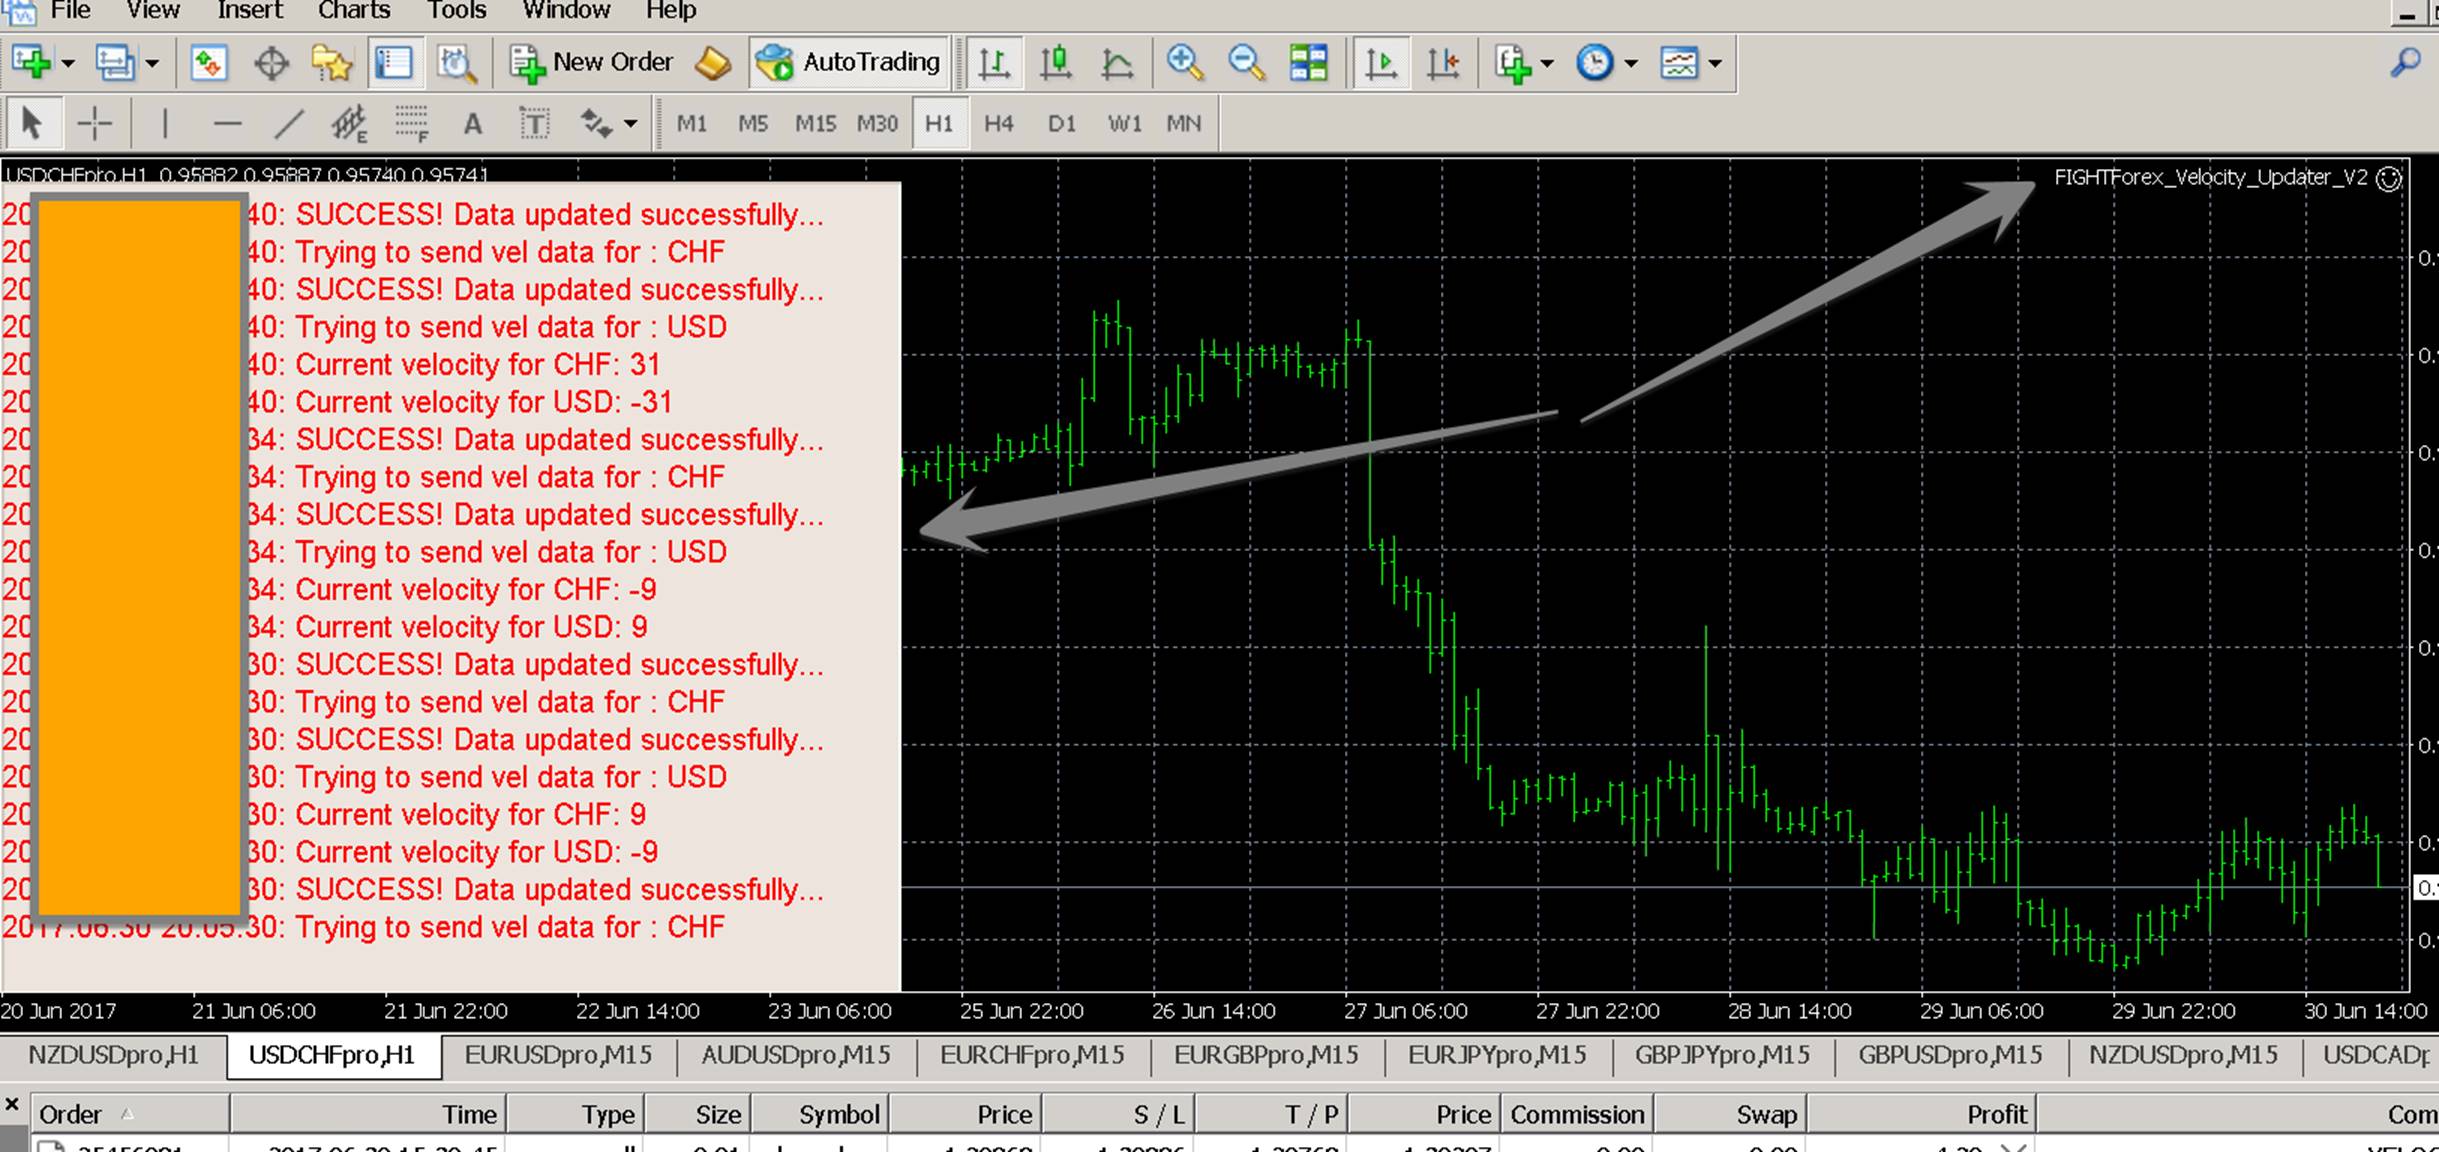
Once you start seeing log like the one shown above consistently and once you have this EA running on ALL 28 currency pair charts, you are all set.
You can now go back to the website and you should see the currency strength chart successfully running as shown below.
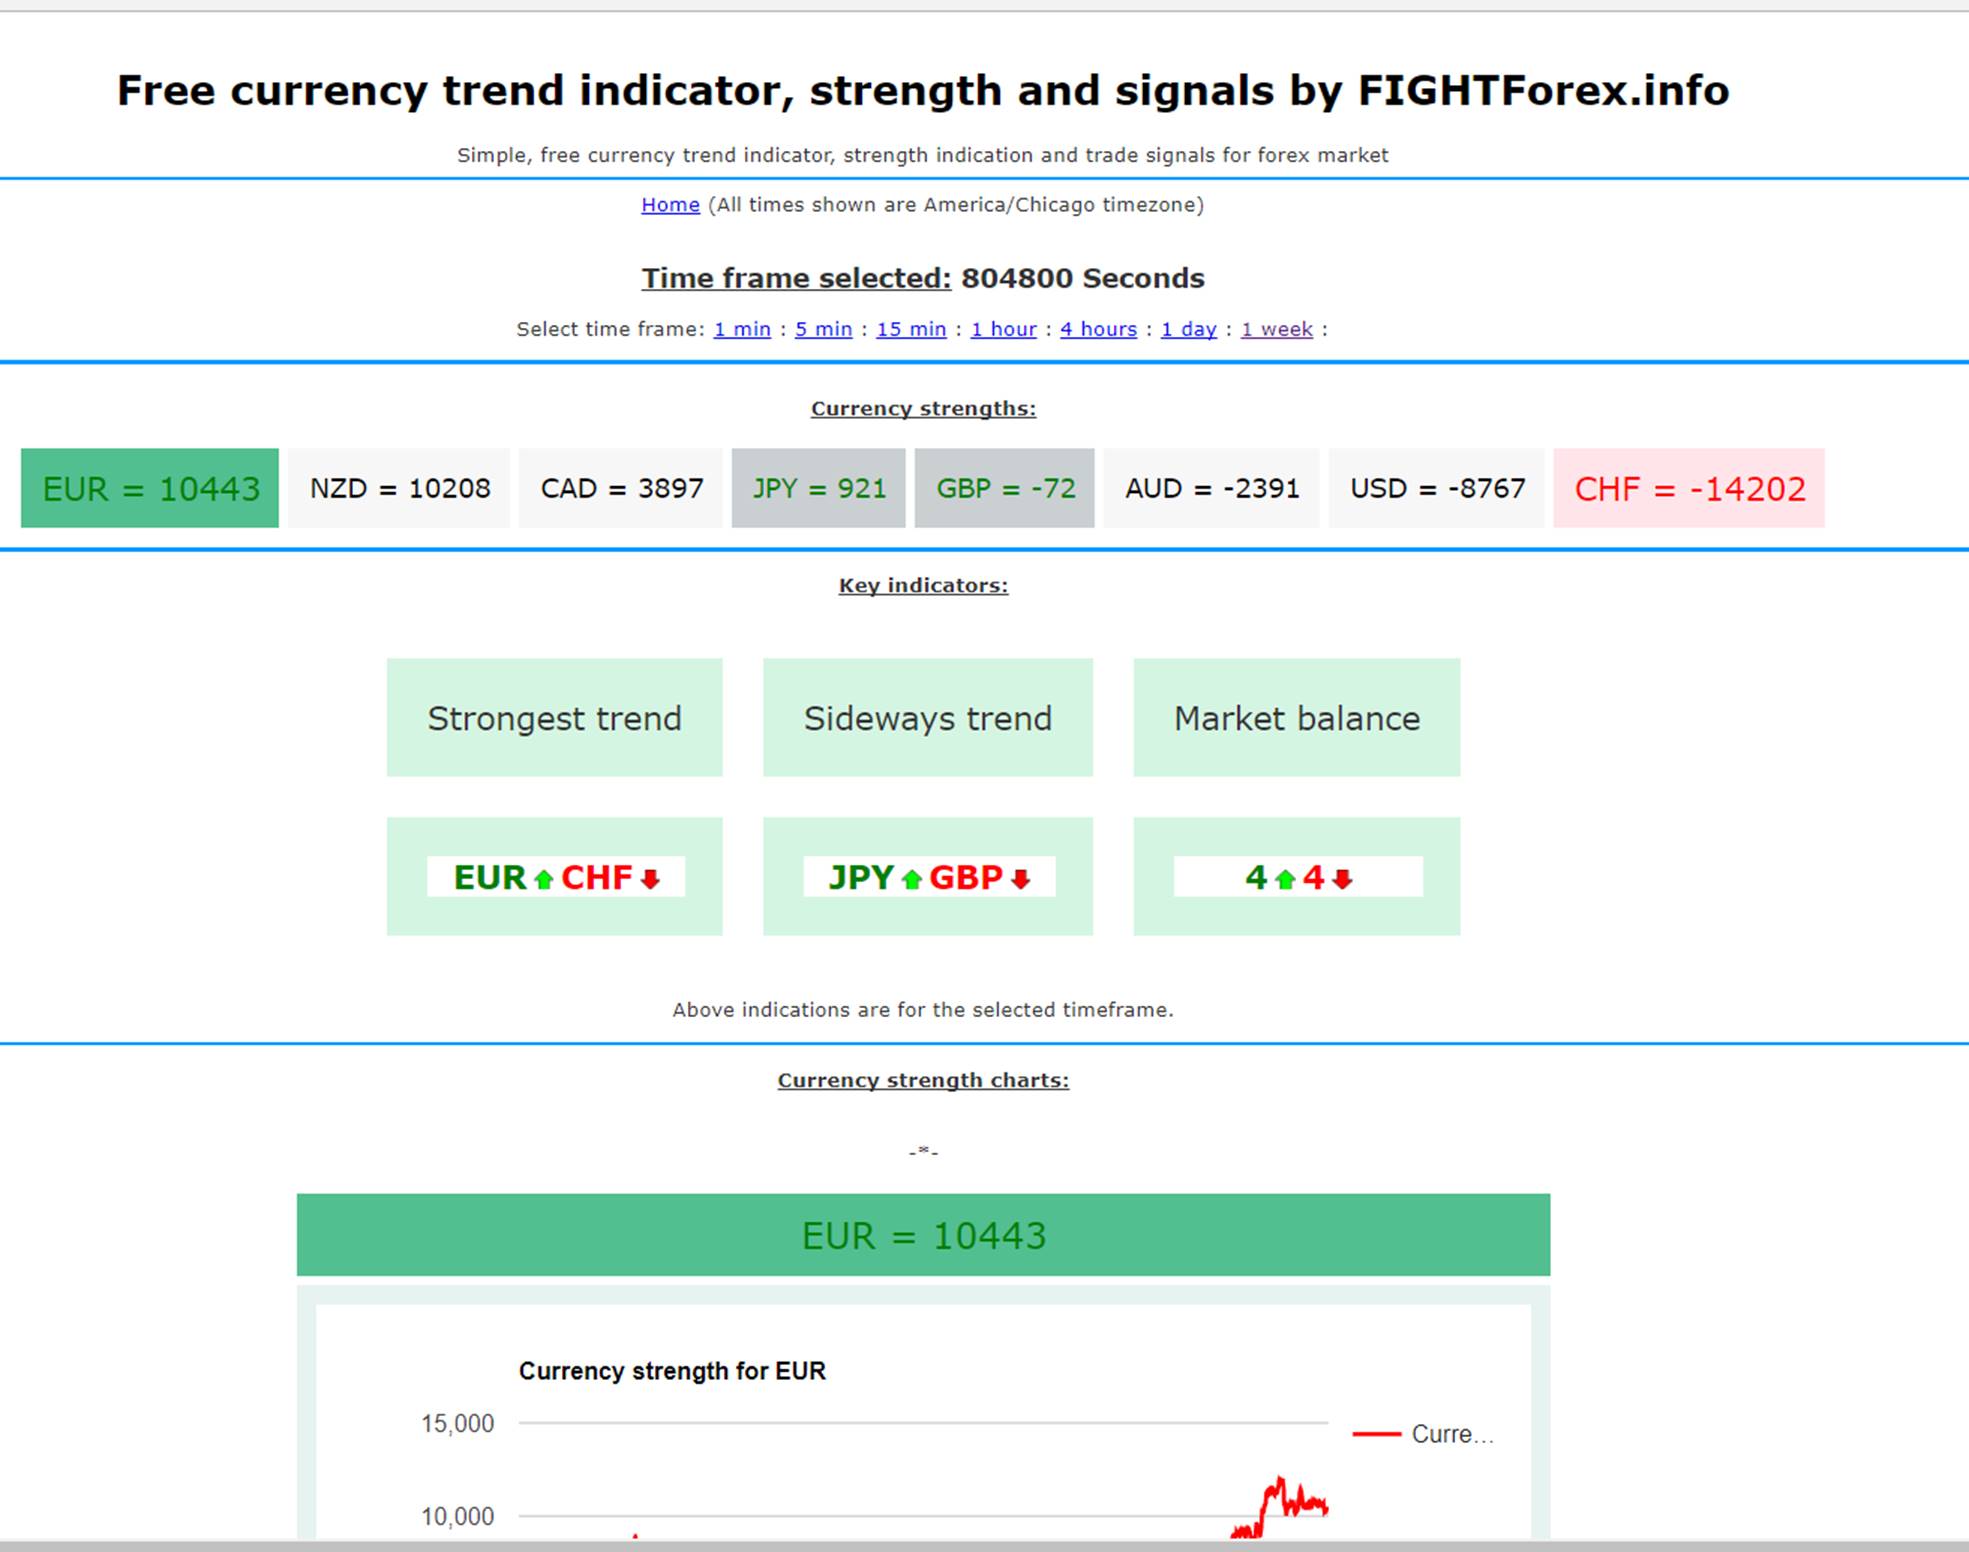
If you see like the screen above, you are done! YOU DID IT!
Thank you and good luck.